Upholstery
SNIP I feel the Oregon Aero seats would be the best choice, but they are about $700
without covering... Yeah, that's just the foam... Becki's are about $615 with Comforfoam and
lumbar support, and DJ's seats come in at $655... SNIP *end of comment*
1-8-04:
First let me say that I have nothing against anyone else's seats. I hope they sell a
million sets. But do those prices include.... arm rests, side panels, storage
compartments, and all the other custom stuff you might dream up? Heck, you built a
plane... you can do this yourself for well under $200 !!!!!
(1-22-04:
I'm virtually finished and I've got less than $150 in mine. I
probably could cut that by a few more dollars with more careful shopping.)
You'll need: Enough fabric to cover everything. I bought 4 yards by 60"
wide material so I'd have plenty to screw up or use later. (1-22-04:
I didn't really screw anything up and I have enough left for the rear seat
booster cushions... maybe I should have bought one or two more yards!) A couple spools
of strong nylon upholstery thread. Some sew on and stick on velcro (Don't
try to sew through the sticky stuff). Enough foam to make your cushions.
And some batting material. Most of this is available at any sewing store,
although an upholstery shop will often have foam the is much more dense (that's
good) than the fabric store. Some lightweight fabric for backing is
helpful too.
Buy some temperfoam from Wicks for your butt. Somewhat expensive, but it's worth every penny!!!!
It is relatively easy to sew your own stuff assuming you have or can borrow a
reasonably decent sewing machine. Get the wife to help. Tell her you really want her to be
involved and that it will help you feel closer and you'll save money. She'll like that... the
saving money part anyway.
An upholstery machine with a walking foot is nice, but not absolutely necessary. Since
we're not talking about huge, thickly padded pieces a standard sewing machine will be OK.
Let's get started.
Go to your local upholstery supply house and buy some seat cushion foam. I bought a few
thickness ranging from 2" to 6" The foam was blue or white and fairly firm. It came from
their scrap pile and cost next to nothing.
Pick out a suitable covering material. Cloth is easiest and cheapest. Vinyl or leather is
OK to work with EXCEPT when you stitch it you gotta hit the stitches right
because if you need to move a seam the holes will show. Vinyl and leather will usually
need a pretty sturdy sewing machine too, so I recommend learning with cloth.
On my RV-4 I used regular upholstery cloth. On the Rocket I am using a ripstop nylon that I bought from Paraphernalia when I bought my chute. It
matches my parachute container. This stuff is a breeze to sew. It
doesn't unravel and it cuts and sews easily too. It was only $10 a yard
too. You can get it at any decent fabric store that has upholstery
products.
Keep in mind that you should try to get the flame resistant stuff or treat it
with flame retardant (although I didn't because I figure that if the seat is on
fire I'm probably already history).
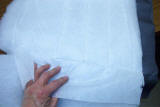
You'll need to get some batting material. This stuff goes behind your covering material
and puffs it out a little to give it a smooth look. This stuff is a pain
in the butt because it unravels and sticks to the velcro. You can use thin
foam also. Or just skip this step, but you're seat coverings won't be very
tight unless you're a better seamstress (or is a male called a seamster?) than I
am.
Buy some sew on velcro and some stick on velcro. You
can't
sew through the stick
on adhesive so don't try. Trust me. Use the adhesive velcro on the aluminum airplane parts
and the sew on stuff on the seat bottoms.
After you gather up all your goodies, toss everything aside except the cheap
upholstery foam.
Sneak into the kitchen and get your wife's electric turkey carving knife with the saw
blade knives. The electric knife works great on foam, just don't let
the wife see you.
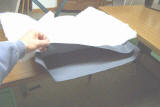
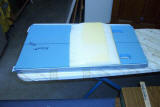
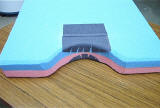
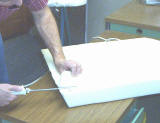 Grab a chunk of foam and
draw the shape that you want your cushion to be on it with a Sharpie. Using the
electric knife, cut the foam to size. If it is going into the rear
seat back (like the piece shown here), make it fit snugly but not so snug that
the cushion bows out... just enough so it stays in position. It will fit a
bit tighter after it gets covered later.
Grab a chunk of foam and
draw the shape that you want your cushion to be on it with a Sharpie. Using the
electric knife, cut the foam to size. If it is going into the rear
seat back (like the piece shown here), make it fit snugly but not so snug that
the cushion bows out... just enough so it stays in position. It will fit a
bit tighter after it gets covered later.
I use 3" foam for the rear seat back, 2" for the front seat back and
Temperfoam for the butt cushions. I like a layer of medium blue Temperfoam
under a soft pink layer for a nice 2" butt cushion. I have a piece of the
hard green temperfoam for use as a booster in the rear seat.
Now back to foam carving, use the knife to round the corners very slightly, dish out a spot for your
shoulders,
carve around obstructions, etc. Go wild. Cut off everything that doesn't look like a
cushion. Don't forget to leave some extra thickness for your lumbar
support. You can use a razor blade or scissors to trim areas where the knife
won't work well.
Don't fret about getting the foam perfectly smooth. The batting will
hide all of that. Just get it shaped to be comfortable. We're not
doing the "Princess and the Pea" and your butt won't feel a few small ridges in
the foam.
After trimming the foam, stick it in the cockpit and sit on it. This is so cool isn't it?
If you cut off too much, you can use spray adhesive to glue foam pieces back together.
Cool, huh? Or just grab a new piece... it's cheap.
Now do the other butt cushions, arm rests, side panels, etc. You'll
want to have these cushions in the plane without any upholstery on them so you
can make sure that they are comfortable before you waste time and effort putting
the fabric on.
After a couple weeks or months have passed and you've sat comfortably on
those cushions many times, you're ready to cover them.
Covering the foam:
 Take your fabric, vinyl, or leather and cut pieces about 3/4 inch larger than each
side of the seat cushions. Make the overhanging amount the SAME everywhere
so you can butt the edges together evenly. If you just hack off some
random excess it will be harder to align the pieces and sew a straight line.
Take your fabric, vinyl, or leather and cut pieces about 3/4 inch larger than each
side of the seat cushions. Make the overhanging amount the SAME everywhere
so you can butt the edges together evenly. If you just hack off some
random excess it will be harder to align the pieces and sew a straight line.
Add velcro to the seat bottom and back pieces now as you can't sew it on after
the cushions are done.
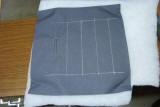
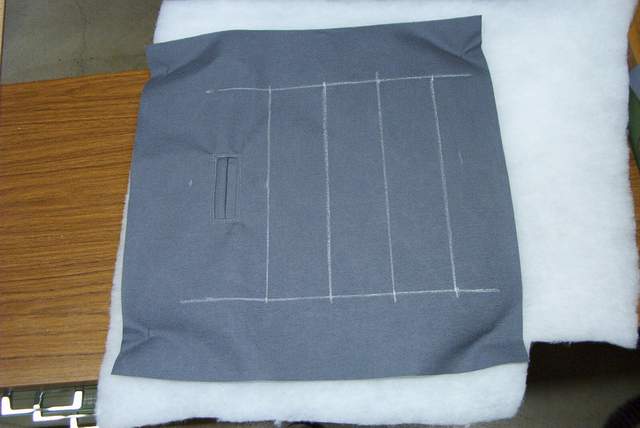
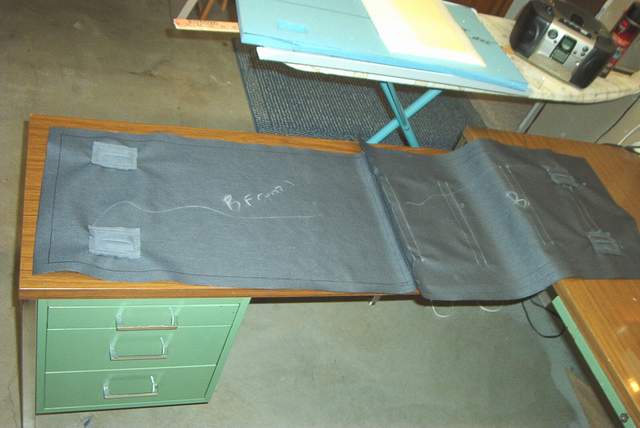
Also, now is the time to layout any pleats that you might want in your seat.
I used Sharpie on this piece even though I knew that it MIGHT bleed through. (I
have no patience.) Later, I went and found a piece of ordinary white
chalk. Chalk works great and vacuums off later.
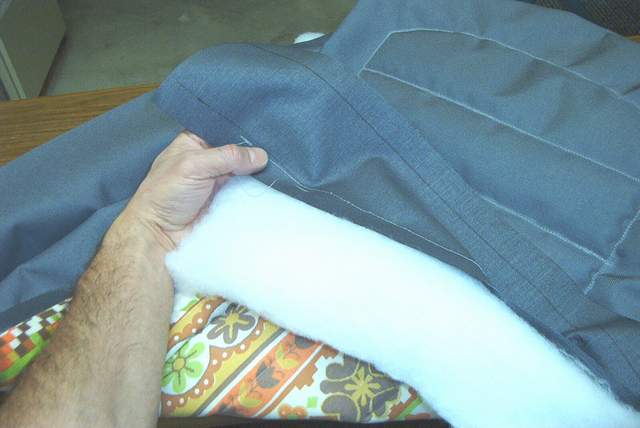
 I use polyester batting to puff out the fabric. You need a backing
material to sew the batting to the fabric. I used this fine, family
heirloom pillowcase from grandma's hippy days. No one will see it.
I use polyester batting to puff out the fabric. You need a backing
material to sew the batting to the fabric. I used this fine, family
heirloom pillowcase from grandma's hippy days. No one will see it.
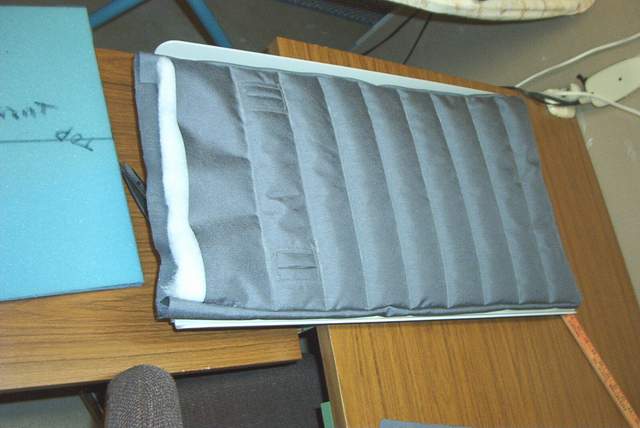
 The fabric, batting and hideously ugly pillow case backing are all sewn
together. Sorta looks like a seat back doesn't it?
The fabric, batting and hideously ugly pillow case backing are all sewn
together. Sorta looks like a seat back doesn't it?
 Here's a closer look at the 3 parts of the seat back.
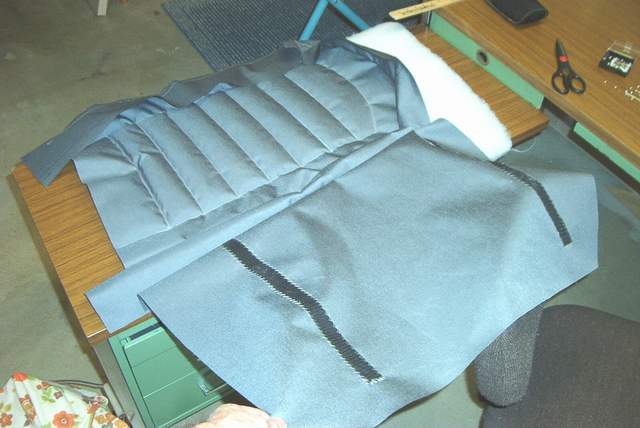
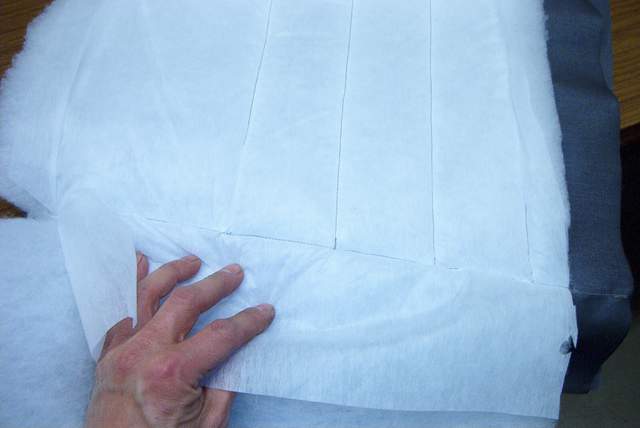
 The sides of the cushion are 3" thick. Here I've sewn the side pieces to
the front. The white stuff is the extra batting that I left attached so I
could roll it around the side of the foam later when the foam is put inside the
shell. It's a bit easier that sewing the batting to the side pieces
but it could have been done that way too. After everything shown was sewn
together, I trimmed the batting to an approximate 4" overhang to give enough to
cover the 3" sides.
The sides of the cushion are 3" thick. Here I've sewn the side pieces to
the front. The white stuff is the extra batting that I left attached so I
could roll it around the side of the foam later when the foam is put inside the
shell. It's a bit easier that sewing the batting to the side pieces
but it could have been done that way too. After everything shown was sewn
together, I trimmed the batting to an approximate 4" overhang to give enough to
cover the 3" sides.
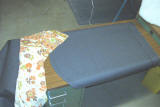
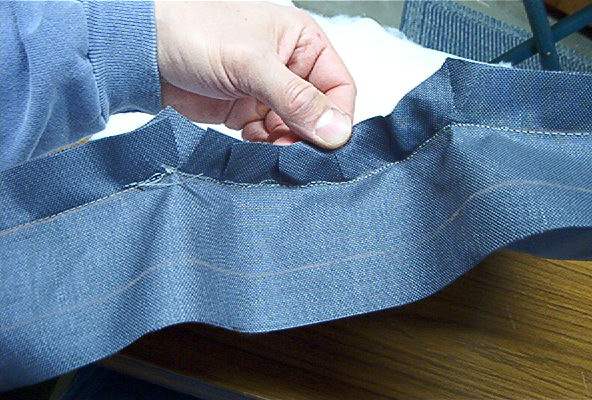
 Next I pinned the back on, shown here right side out, although you have to sew
it inside out. The next picture shows it inside out.
Next I pinned the back on, shown here right side out, although you have to sew
it inside out. The next picture shows it inside out.
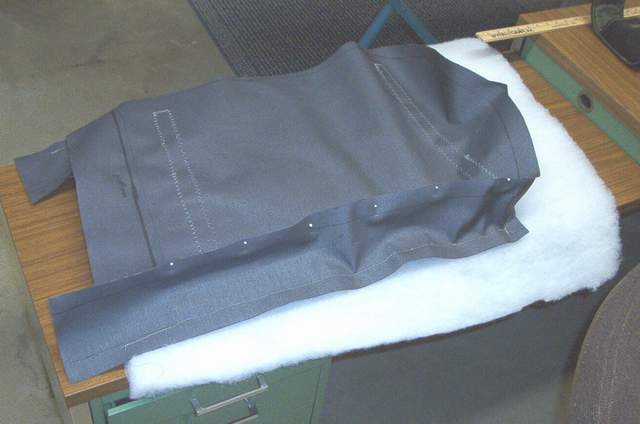
 Here the side pieces are being fitted to the back piece. The back piece is
on top and you can see the seam where I attached the velcro strips to it.
The seams should all be exactly at the edges of your foam pieces that go inside
the shell... measure
carefully and double check.
Here the side pieces are being fitted to the back piece. The back piece is
on top and you can see the seam where I attached the velcro strips to it.
The seams should all be exactly at the edges of your foam pieces that go inside
the shell... measure
carefully and double check.
You can
use pins or STAPLES (yeah, a regular stapler) to hold things together. I like
the stapler because you can really put the stuff together quickly and firmly
although I used regular pins in this photo. If you use staples you
have to be careful to NOT sew over them or you'll have great difficulty removing
them. Or just don't remove them and risk a rust stain if it ever gets wet.
If you want to be sure that you've got the pieces together correctly after
pinning everything, turn it right side out and have a look. Then reverse it
again and sew the parts together...try to sew in a straight line and keep the
pieces from puckering.
Pull the pins or staples as you sew. Or do it when you're done sewing. Be careful not to
break a sewing needle on the pins as can occasionally happen when sewing over
the pins.
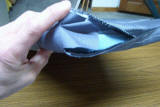
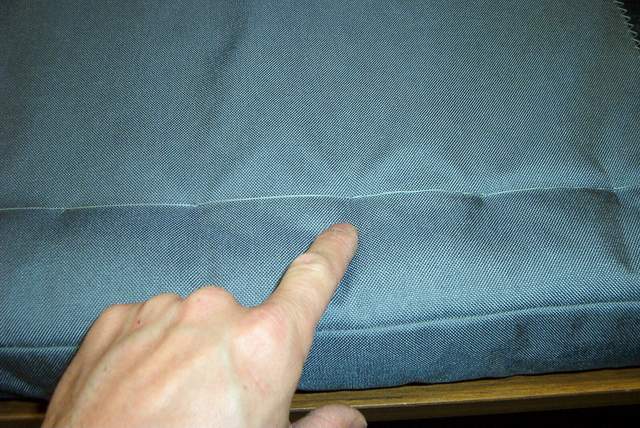
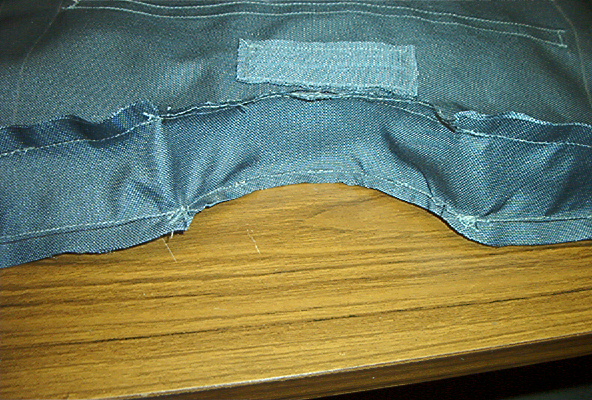
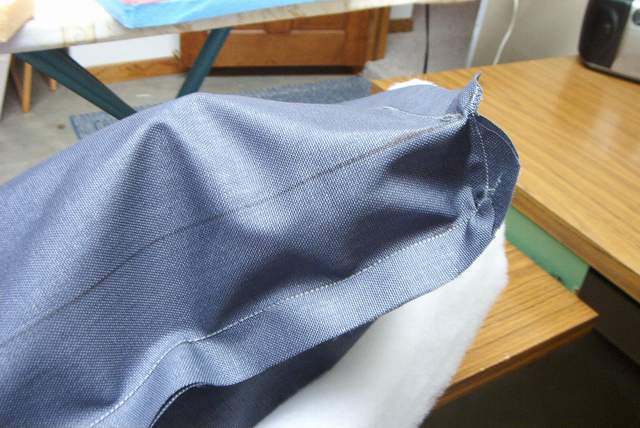
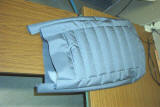 Here's the seat back showing the open bottom. You'll need to leave one
seam, usually the back rear seam, undone so you can turn it right side out after
sewing.
Here's the seat back showing the open bottom. You'll need to leave one
seam, usually the back rear seam, undone so you can turn it right side out after
sewing.
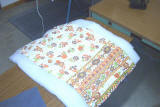
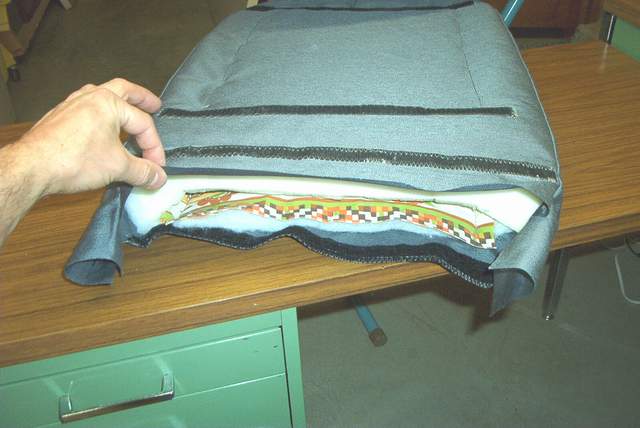
It's time to take the cushion and carefully stuff it into the cover.
Smooth out the batting as needed.
 Your cushion probably looks a little loose right now. Finish it off by taking a
long needle and heavy thread and sewing all the way through the cushion at
intersections of the pleats. You'll probably only need to make one stitch
per seam intersection to take up any puffiness. It's the same idea as the
buttons on the back of a regular couch cushion...make it stay the shape that you
want it to.
Your cushion probably looks a little loose right now. Finish it off by taking a
long needle and heavy thread and sewing all the way through the cushion at
intersections of the pleats. You'll probably only need to make one stitch
per seam intersection to take up any puffiness. It's the same idea as the
buttons on the back of a regular couch cushion...make it stay the shape that you
want it to.
The photo above shows the thread on the BACK side of the cushion where nobody
will see it. You don't need to pull the stitches very tight, just snug.
Make a knot at each stitch.

 Finally, the remaining unsewn seam can be sewn shut. Just tuck it all inside and sew it
shut. Some people use a zipper here, but it's not really needed. No need to unstuff
these things. If these things get dirty, just use upholstery cleaner on them or
make new ones. It wasn't that hard anyway!
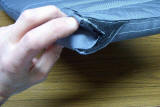
Or
you can use velcro to close them like shown above. It's easier to sew on
than a zipper and is more adjustable. As you can see in the picture, I
simply folded everything together much like you'd do when wrapping a gift.
As you can see in the last photo, it looks fine!
Finally, the remaining unsewn seam can be sewn shut. Just tuck it all inside and sew it
shut. Some people use a zipper here, but it's not really needed. No need to unstuff
these things. If these things get dirty, just use upholstery cleaner on them or
make new ones. It wasn't that hard anyway!
Or
you can use velcro to close them like shown above. It's easier to sew on
than a zipper and is more adjustable. As you can see in the picture, I
simply folded everything together much like you'd do when wrapping a gift.
As you can see in the last photo, it looks fine!
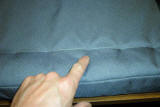
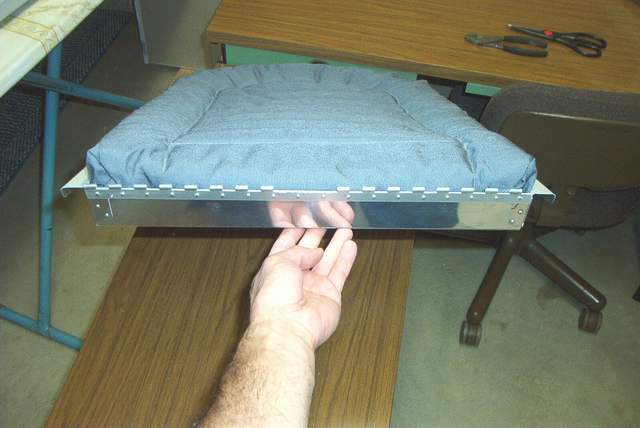
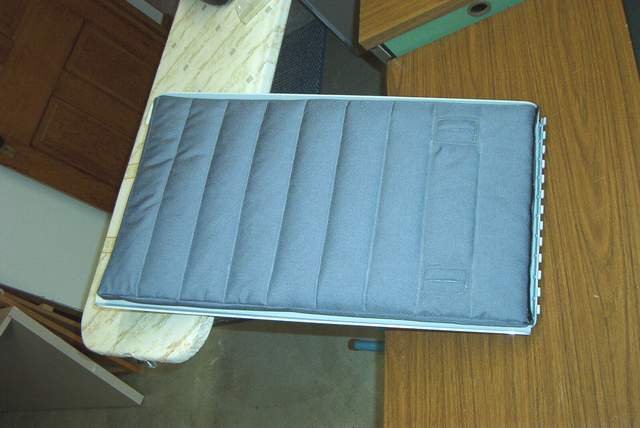
 Looks good on the sewing table. You can see how the fabric is pulled down
snugly against the cushion at the seam intersections by the stitches that were
sewn through the cushion.
Looks good on the sewing table. You can see how the fabric is pulled down
snugly against the cushion at the seam intersections by the stitches that were
sewn through the cushion.
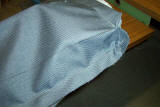
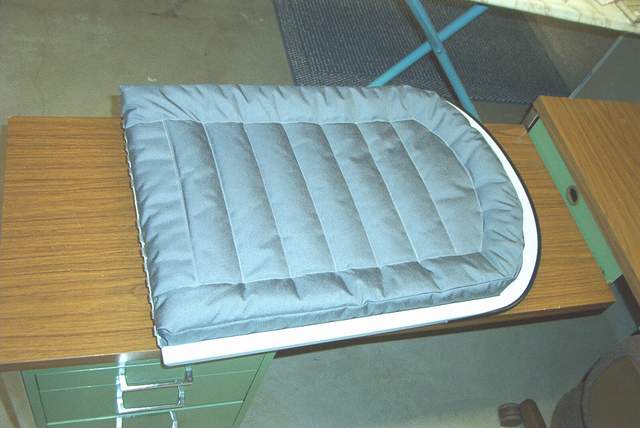
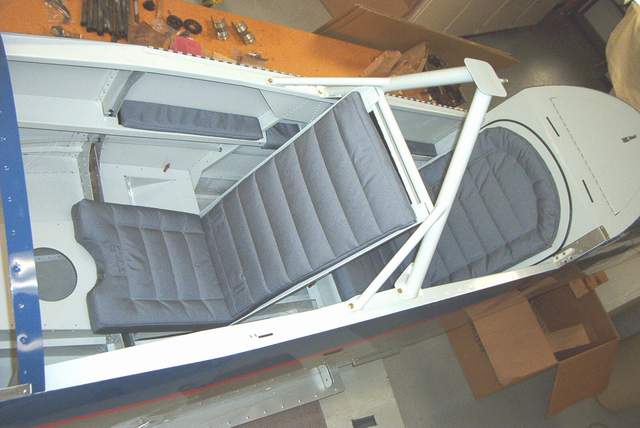
I wonder how it will look in the plane?
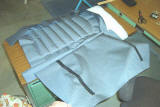
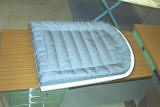
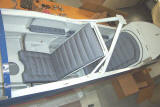
_small.jpg) Finished and installed. LOOKS FABULOUS!!!
Finished and installed. LOOKS FABULOUS!!!
More pictures: Sorta redundant,
but here's a few more shots taken as the work progressed.
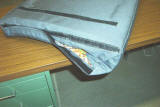
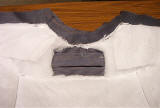
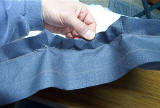
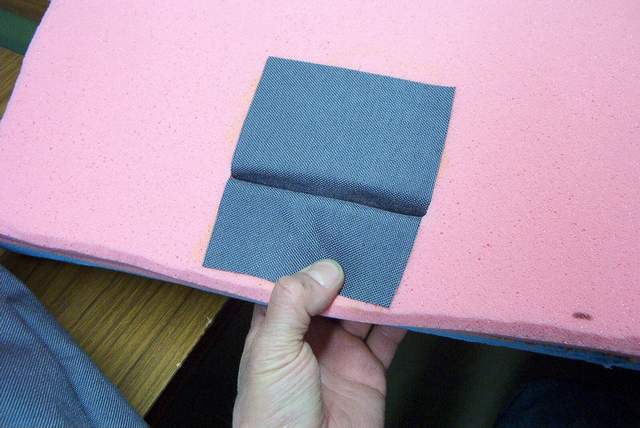
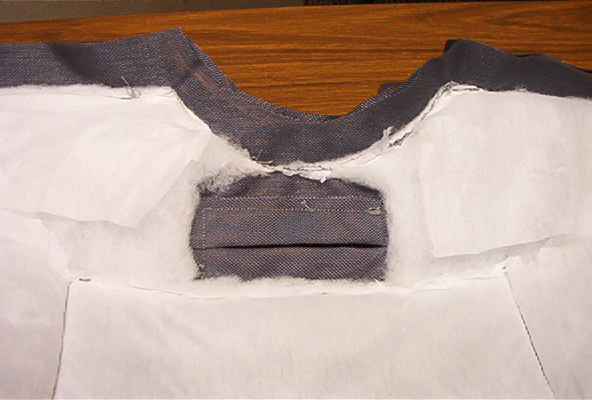
 Seat belt holes: You might need a hole for your seat belt
or crotch strap to pass through. Simply slit the foam and glue some fabric
to the foam as shown. The fabric passes all of the way through the foam. This will prevent the foam from showing through to
the outside when the fabric covering is installed. Use 3M spray adhesive to glue the fabric to the foam.
Seat belt holes: You might need a hole for your seat belt
or crotch strap to pass through. Simply slit the foam and glue some fabric
to the foam as shown. The fabric passes all of the way through the foam. This will prevent the foam from showing through to
the outside when the fabric covering is installed. Use 3M spray adhesive to glue the fabric to the foam.
I like to slightly bevel the edge of the foam as seen here. It makes a
little room for the seams to lay down smoothly.
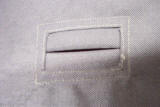
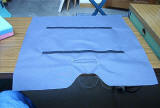
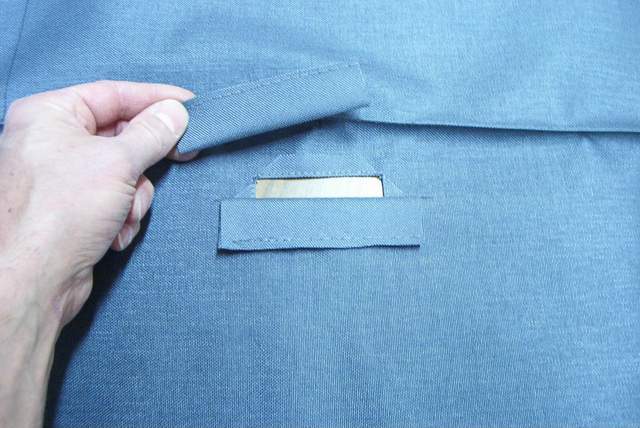
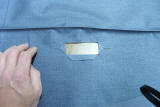 The seatbelt will pass through these holes in the fabric. To make these,
cut an X in the fabric from corner to corner of the opening. Fold the
little triangles of fabric under and sew them down as shown.
The seatbelt will pass through these holes in the fabric. To make these,
cut an X in the fabric from corner to corner of the opening. Fold the
little triangles of fabric under and sew them down as shown.
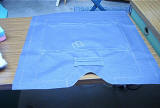
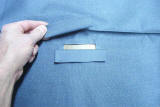 Turn the fabric over to the inside. Fold over a scrap of fabric and stitch
it to itself so it stays folded. Place the folded fabric over the hole as
shown and pin in place.
Turn the fabric over to the inside. Fold over a scrap of fabric and stitch
it to itself so it stays folded. Place the folded fabric over the hole as
shown and pin in place.
 Then turn the fabric over to the outside side and sew the whole thing together.
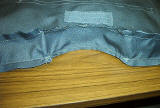
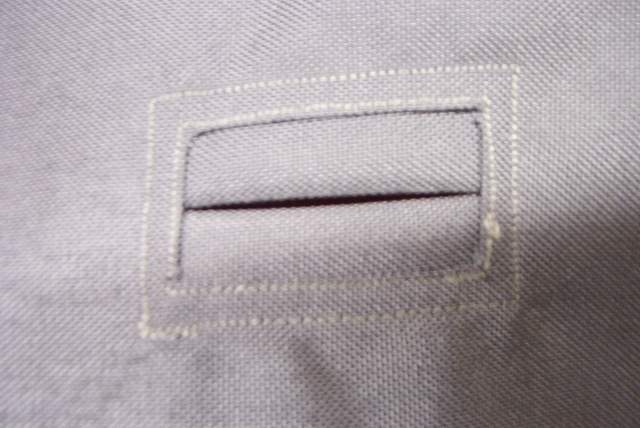
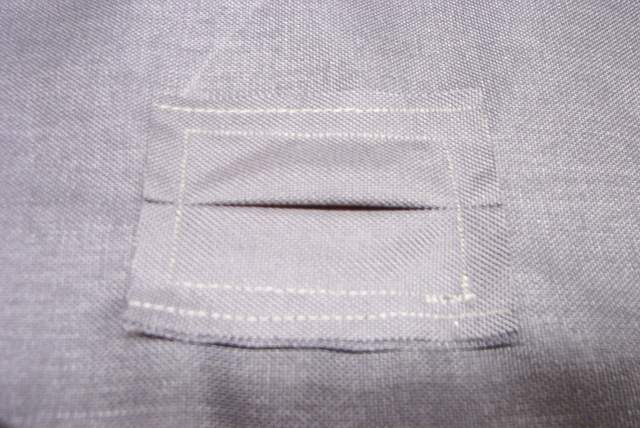
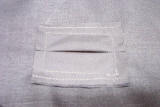 Here's what the inside looks like.
Rear seat bottom cushion:
 Layout and batting
 Inside corner detail. An easy place to screw up! Try to sew a box
corner from scraps first!
Inside corner detail. An easy place to screw up! Try to sew a box
corner from scraps first!
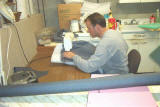 The genius at work.
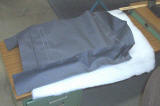
 The bottom cushion almost ready to stuff with the foam.
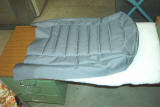
 Wow. I should go into the upholstery business. I cut this
seat to fit ME! It has a lumbar support and is dished out a bit to fit my
shoulders. NO LIE... it is the most comfortable seat I own, easily beating
even the seats in my brand new Chevy Avalanche!! And if I can do
this, you can too!
Wow. I should go into the upholstery business. I cut this
seat to fit ME! It has a lumbar support and is dished out a bit to fit my
shoulders. NO LIE... it is the most comfortable seat I own, easily beating
even the seats in my brand new Chevy Avalanche!! And if I can do
this, you can too!
Front seat back: 1-13-04
 Hacking out the foam. On the right side you can see the lumbar support, an
indispensable item for my bad back.
Hacking out the foam. On the right side you can see the lumbar support, an
indispensable item for my bad back.
 Glue the lumbar pad to the main piece with 3M spray glue. The differing
colors of foam is merely a coincidence. They are the same density.
Glue the lumbar pad to the main piece with 3M spray glue. The differing
colors of foam is merely a coincidence. They are the same density.
 The seat belt holes get fabric glued to the edges so the foam doesn't show
through.
The seat belt holes get fabric glued to the edges so the foam doesn't show
through.
 Laying out the covering. You can see the seat belt holes on the left.
Don't forget to sew some velcro to the back piece before you close everything
up.
Laying out the covering. You can see the seat belt holes on the left.
Don't forget to sew some velcro to the back piece before you close everything
up.
 All this piece needs is some velcro strips on the end and it will be ready to
close.
All this piece needs is some velcro strips on the end and it will be ready to
close.
 Closing the cushion after adding the velcro.

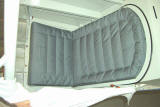
 Finished front seat back.
 The front seat cushion with control stick cutout. The cutout area makes
this piece much harder for an amateur like me to sew. Nonetheless, it is
not all that hard.
The front seat cushion with control stick cutout. The cutout area makes
this piece much harder for an amateur like me to sew. Nonetheless, it is
not all that hard.
 I kinda made a mess of the batting in this area. Later I trimmed off those
small nubs around the seat belt hole.
I kinda made a mess of the batting in this area. Later I trimmed off those
small nubs around the seat belt hole.
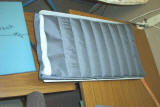
 The bottom piece showing the seatbelt holes and velcro strips.
 Here I've got the top front seam ready for stitching. You can readily see
the curve that makes the piece more difficult to sew.
Here I've got the top front seam ready for stitching. You can readily see
the curve that makes the piece more difficult to sew.
 Here the pieces are sewn together prior to turning the whole thing right side
out and stuffing the foam in. The aft end of the cushion was closed with
velcro just like the other cushions were. I also used some thread to draw
the pleats snugly against the foam like was done on the others.
Here the pieces are sewn together prior to turning the whole thing right side
out and stuffing the foam in. The aft end of the cushion was closed with
velcro just like the other cushions were. I also used some thread to draw
the pleats snugly against the foam like was done on the others.
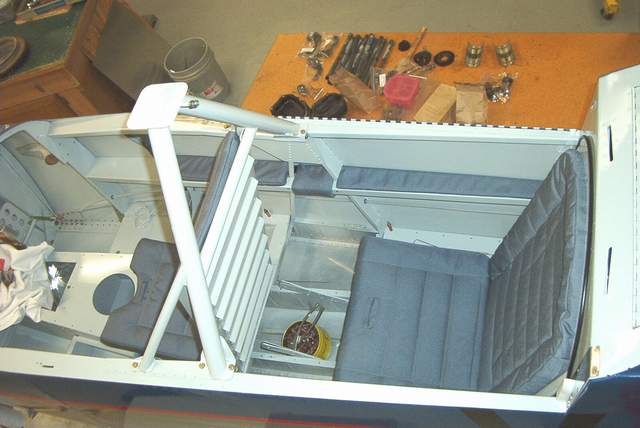
 Whoa! Did I do that? Looks good. I've got some nice light gray
fabric that I plan to glue to the cockpit walls to complete the interior.
Whoa! Did I do that? Looks good. I've got some nice light gray
fabric that I plan to glue to the cockpit walls to complete the interior.
Also, I might add some anti-skid tape to the floorboards. I'm not a big
fan of carpeting in airplanes. It's too much trouble.
If you want your seats to be really tricked out, you can get some of the piping for the
edges and sew it in while seaming it all together. It makes the sewing a bit more
difficult though as you need to sew the piping to one side before sewing
everything together. That's why I don't use it... it doubles the
sewing.... which is why new cars don't have the piping on the edges of their
seats anymore also!!!!
You can also put pleats in, monograms, etc... limited only by your
imagination or patience! I have a vivid imagination but I am definitely
PATIENCE limited. Doh!
Now you can use the leftover stuff to make all sorts of other goodies.... if you've got
any patience left!!!
If this section didn't explain the process to you clearly, there are hundreds
of upholstery how-to websites out there.
Have fun, Vince Frazier

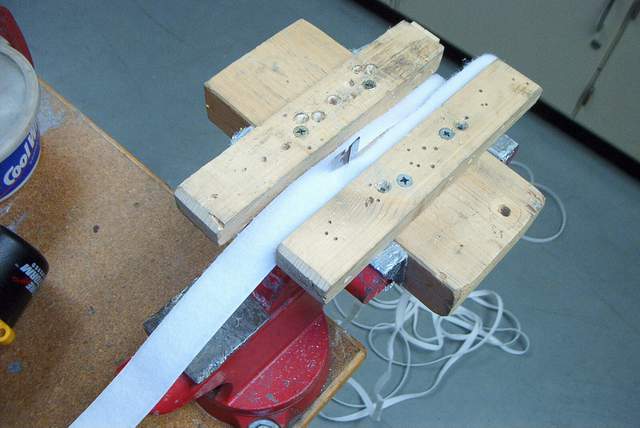
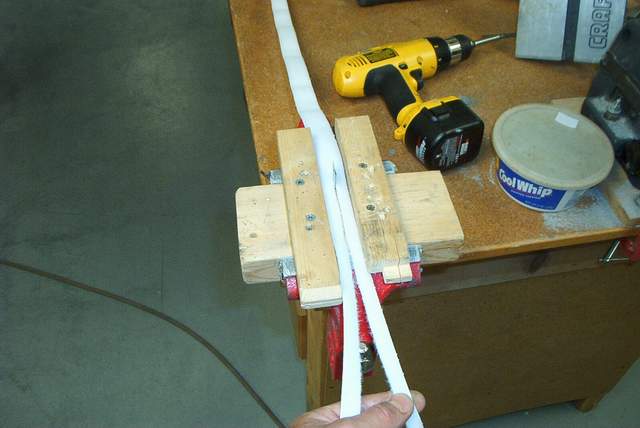
 This is a simple, yet handy tool I made to save a few bucks. I had 50' of
1" velcro. I needed about 100' for the tent windows I was modifying.
I could have bought more velcro, but that costs money! I could have used
scissors to split the velcro down the middle, but that would be very time
consuming and tedious. I cobbled together a few scraps of wood to guide
the velcro past the razor blade imbedded in the middle. It was then a
simple and quick operation to slit the velcro into two 1/2" strips. Worked
great. Vince Frazier
This is a simple, yet handy tool I made to save a few bucks. I had 50' of
1" velcro. I needed about 100' for the tent windows I was modifying.
I could have bought more velcro, but that costs money! I could have used
scissors to split the velcro down the middle, but that would be very time
consuming and tedious. I cobbled together a few scraps of wood to guide
the velcro past the razor blade imbedded in the middle. It was then a
simple and quick operation to slit the velcro into two 1/2" strips. Worked
great. Vince Frazier
Return to the homepage:
http://www.vincesrocket.com/
Last updated:
09/01/06
CAUTION: This web site is not a
publication of, nor approved by, Harmon LLC, Team Rocket, Van's Aircraft or any other person or entity listed herein,
except me. Be advised that I am a blithering idiot with neither brains nor
money and my advice is not to be trusted. So there. You have been warned!
Vince
 Grab a chunk of foam and
draw the shape that you want your cushion to be on it with a Sharpie. Using the
electric knife, cut the foam to size. If it is going into the rear
seat back (like the piece shown here), make it fit snugly but not so snug that
the cushion bows out... just enough so it stays in position. It will fit a
bit tighter after it gets covered later.
Grab a chunk of foam and
draw the shape that you want your cushion to be on it with a Sharpie. Using the
electric knife, cut the foam to size. If it is going into the rear
seat back (like the piece shown here), make it fit snugly but not so snug that
the cushion bows out... just enough so it stays in position. It will fit a
bit tighter after it gets covered later. 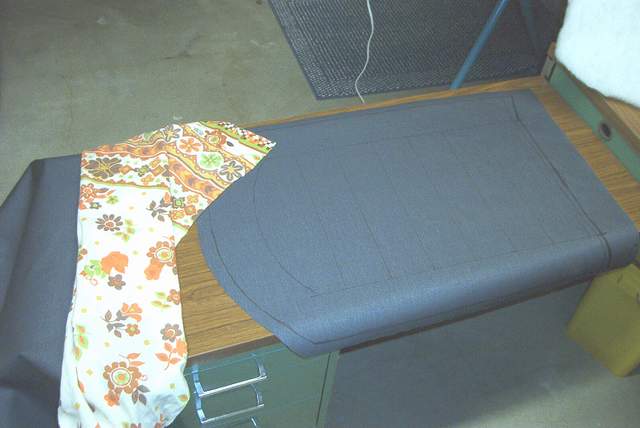


.jpg)


