 9-17-03: It's so much fun to prep for painting.
Sort of like getting a sigmoidoscopy while you've got a migraine.
9-17-03: It's so much fun to prep for painting.
Sort of like getting a sigmoidoscopy while you've got a migraine. Painting
Tidbits: It is MUCH easier to paint the cockpit
without the sides skin riveted on. Paint everything and then touch up the
bucktails after the skins are riveted on.
But you probably have a quickbuild, so you'll have to paint it as is.
I would get a small airbrush like most hobby stores sell. Harbor Freight has
cheap ones too. Either work fine. Get or make an adapter so you can use your
regular air compressor to power it. Use it to spray the interior paint.
The worst part of painting the interior is that overspray gets all over the
previously painted, but not quite dry yet, stuff. If you plan on painting
small sections, rather than everything at once, you can cover up the finished
parts with a sheet or whatever. Makes the finished parts much smoother. This
is also why I like the small airbrush. Much less overspray and you can get it
in the nooks and crannies where even a small touchup gun won't fit.
Also the airbrush is good for the many small items you spray. For example, I
used an airbrush to prime all of my 6061 angles, steel parts, etc. You
quickbuilders won't have as much stuff to paint, but there's still plenty.
I do like a touch up gun for most of the mid-sized jobs. Anything up to
control surface size. Only for wing panels, fuselage, cowl, etc do I ever use
a full sized gun.
I used Sherwin Williams Sunfire on the interior and engine mount. That stuff
is bulletproof. Even acetone doesn't touch it, so you can wipe off stray
sharpie marks. I am quite pleased with it, even though it was $120 for the
supplies I needed to paint the interior. That price included more hardener
and reducer than I'll ever use.
On the exterior I used PPG basecoat/clearcoat Concept products. I thought
that they worked very well. Here's how I did my painting.
The key to any spray painting is getting a good clean surface to spray.
That's easily done on NEW airplanes that have NOT been flown yet, IMHO. Paint
won't stick well to oil oozing rivets.
Another tip to getting a good spray job is to always put the first coat on
very lightly. Just enough to shade the surface. This gives the subsequent
coats something to stick to and after the first coat dries a bit then it acts
like a sponge and draws off the solvents from the subsequent coats. This
helps prevent runs. You can prove this to yourself by painting a thick coat
first and watching it run everywhere.
I used scotchbrite pads to scuff the aluminum, then etched and alodined them.
The paint supplier said I didn't need to do the scotchbrite step but I don't
think it can hurt and nothing would be worse than a great paint job with poor
adhesion.
The PPG K36 filling primer fills quite well and is easy to sand. However, as
you will find on the cowling, any pinholes must be filled first or they just
keep coming through. For your first coat on anything fiberglass, you'll
probably have the best luck by squeegeeing or using your finger to force the
primer into the pinholes. Then wet sand everything off. Then you're ready to
spray a coat of filling primer (if needed) or PPG DP40LF primer. The DP40LF
can be used over anything up to 180 grit scratches according to my supplier.
He must be correct because I didn't have any scratches show through.
The basecoat dries to a somewhat uneven satin finish that doesn't look good at
all. As long as there aren't any scratches showing though, it will be fine.
Solid colors are easy to paint. Metallics aren't. If you don't do them
exactly right, the metallic can separate and cause unsightly shadows, striped
and mottled areas. The key is to put the metallics on uniformly, lightly, and
dry. Dry means that you don't try to get the paint to flow out enough to
gloss.
The clearcoat was a hoot to shoot. It makes the basecoat come alive. The key
seems to be to spray the clearcoat heavy enough to flow out the orange peel
but not enough to run. The PPG stuff was very forgiving in that area,
actually somewhat difficult to get a run. You DON'T want any orange peel
because it's too hard to buff out. Much better to have a few runs as they are
easily eliminated with a nib file followed with 2000 grit paper and buffing
compound. I've even seen a razor blade used in place of the nib file to knock
down the runs by scraping the blade across the run.
PPG was expensive. I spent about $1800 on the various stuff required. But it
went on fairly easily. If it's durable... I'm a happy painter. I'll let you
know in 20 years.
The biggest advantage/disadvantage to the PPG (and most other automotive paint
systems) is that they are time sensitive. You have to put the basecoat on
within one week of priming and the clearcoat within 24 hours of the basecoat.
This is to save shop time as it eliminates the sanding steps in between. If
you can keep up it goes quickly. But if you want a leisurely pace and prefer
to sand between each step, then you'd better stick with more traditional paint
systems.
An advantage though is the clearcoat. It really shines and you can buff it as
often as you want. Something that you can't do with some of the
polyurethanes.
Now, if you're in the People's Republic of Kalifornia, I have heard rumors
that your paint supplier might not have the same stuff as mine. I don't know
if that's true or not.
Have fun and if things go awry... well that's why someone invented paint
stripper and sandpaper. DOH!
Vince
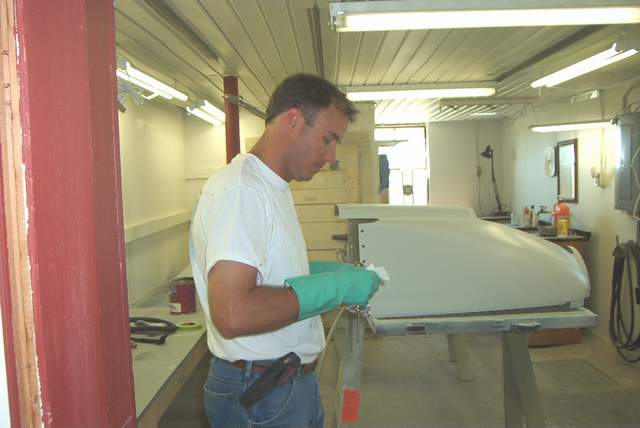
9-17-03: It's so much fun to prep for painting.
Sort of like getting a sigmoidoscopy while you've got a migraine.
I'm using PPG DBU basecoat/clearcoat. In the pics above I'm filling all of those @$%& pinholes and sanding. I primed the cowl halves with filling primer and then proceeded to attack the pinholes. I'm not sure if filling the pinholes first might not have been easier. Who knows?
I scuffed with scotchbrite, etched and alodined the aluminum parts. What a pain, but my body shop friend assures me that it is worth it. He's painted several planes so I suppose he's correct. I'll know in a few years.
Painting tip: Follow the manufacturers directions. I am and, so far, the paint is turning out fabulous!
 Priming the tail and control surfaces.
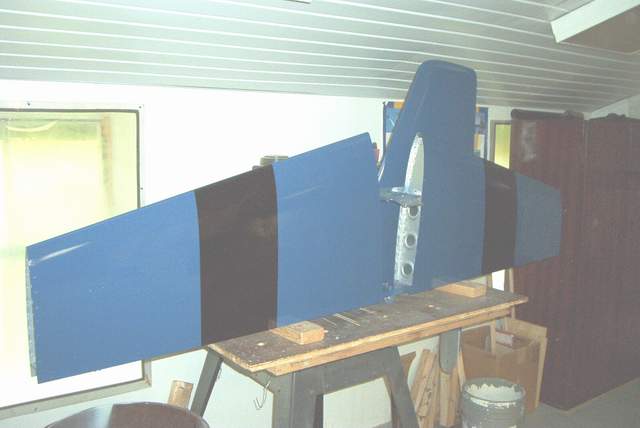
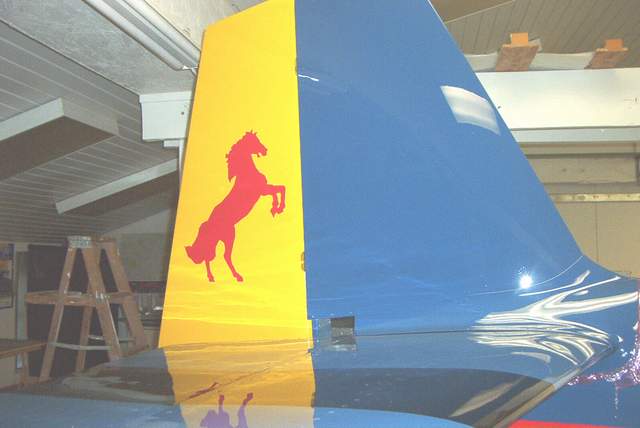
 Finished tail surfaces! Blue on top, fading into the silver bottom.
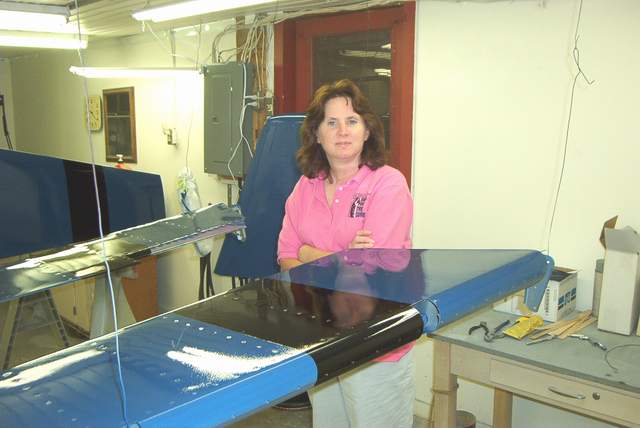 Chief inspector, financial officer, occasional rivet bucker, and all-around
sweetie, my wife, Tammy.
Chief inspector, financial officer, occasional rivet bucker, and all-around
sweetie, my wife, Tammy.
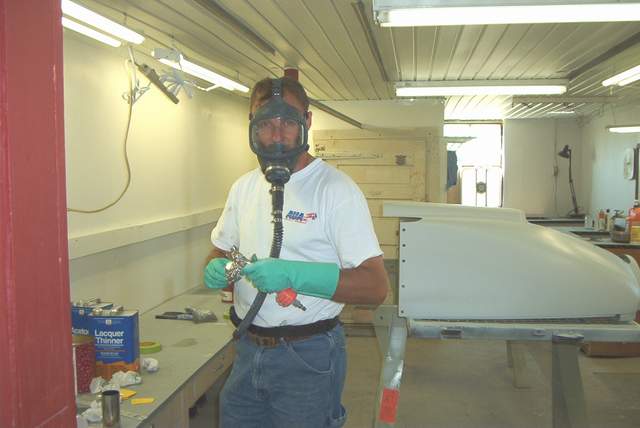
 This is what your hair looks like after a little clear coating.
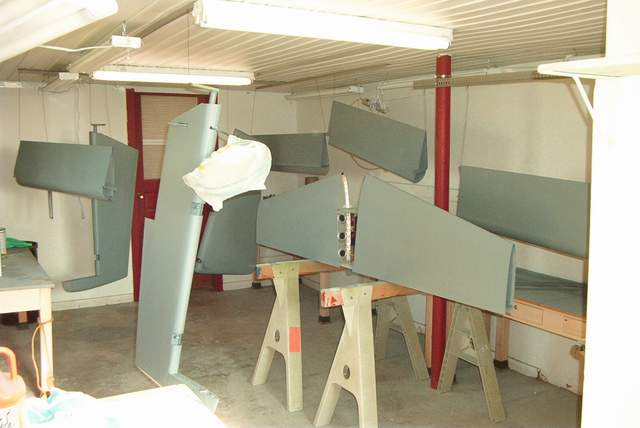
 Hanging storage until I'm certain that the paint is cured.
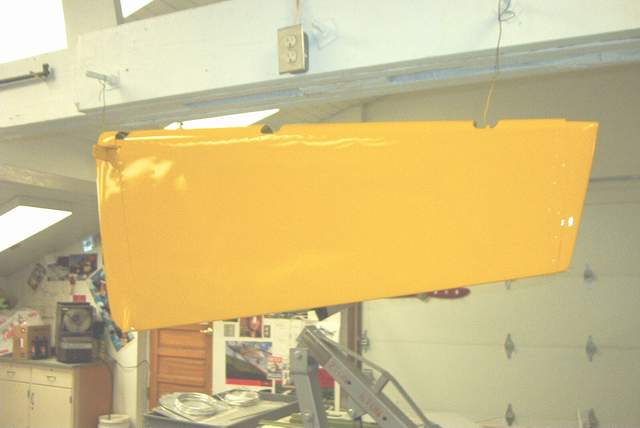
 Bright yellow rudder. I need my sunglasses to look at it.

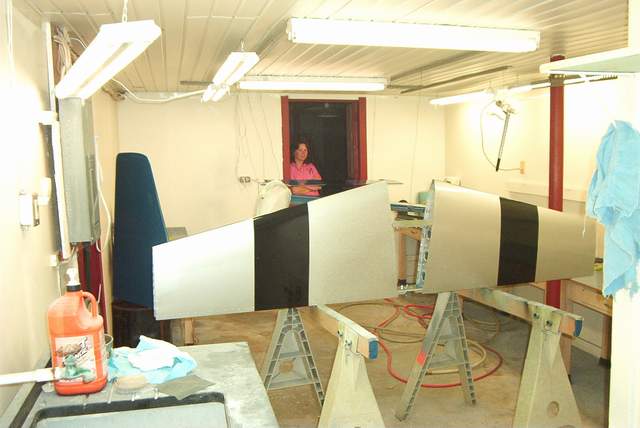
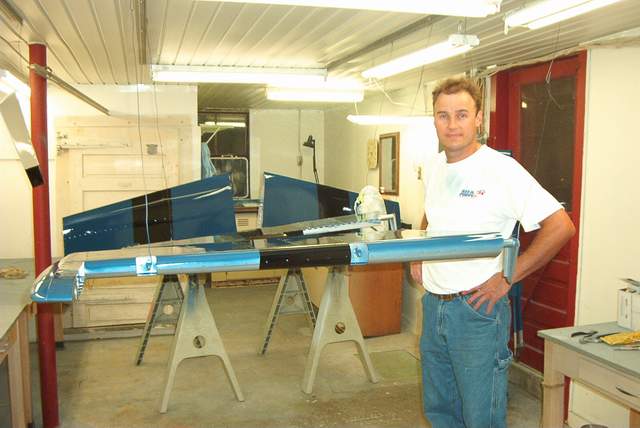
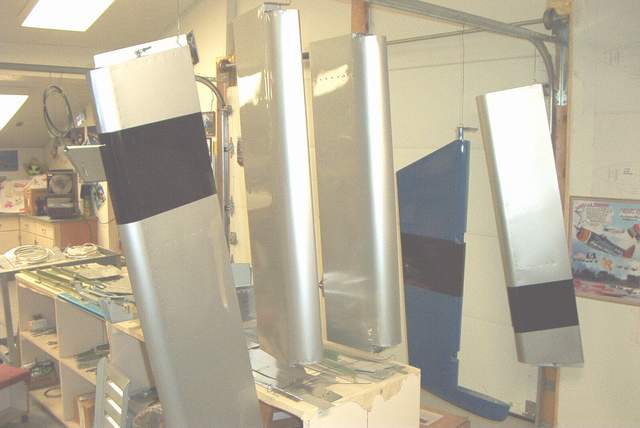
 Fogging on the black paint prior to masking off and shooting the silver.
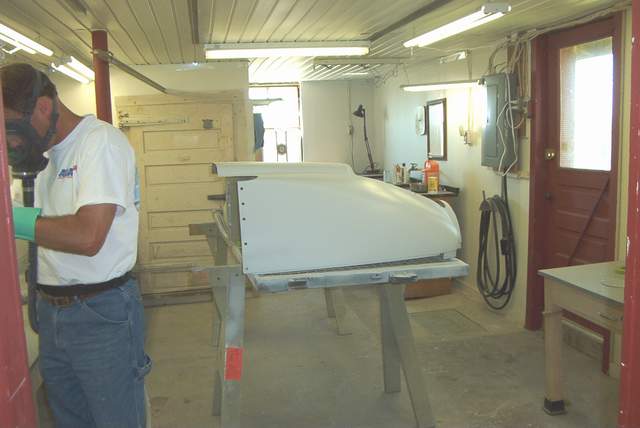
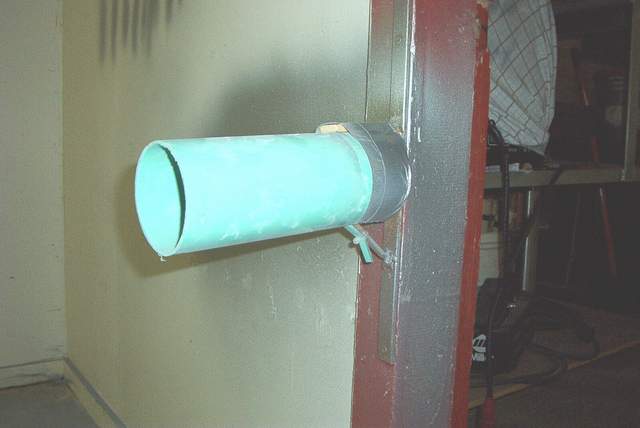
As you can see in the second photo, there's a heavy duty bracket bolted to the
door frame. A 4" piece of PVC pipe is slid over the bracket. The
pipe goes into the end rib. When I want to rotate the wing, I simply
grab the spar and flip it over. It's a one man operation that is easily
done while painting. The spar and rear spar simply rest on the sawhorse.
Very simple and easy, just be careful not to drop the rear spar off of the
edge of the sawhorse.
Fogging on the black paint prior to masking off and shooting the silver.
As you can see in the second photo, there's a heavy duty bracket bolted to the
door frame. A 4" piece of PVC pipe is slid over the bracket. The
pipe goes into the end rib. When I want to rotate the wing, I simply
grab the spar and flip it over. It's a one man operation that is easily
done while painting. The spar and rear spar simply rest on the sawhorse.
Very simple and easy, just be careful not to drop the rear spar off of the
edge of the sawhorse.
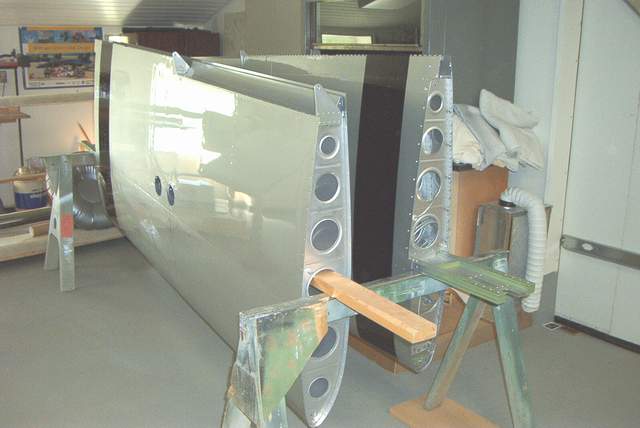 The wings can be stored as shown so that nothing touches the precious
paint that might stay soft for several days. They are actually quite
stable, though I don't let kids run amuck in my shop. The 2x4 stuck in
the lightening holes doesn't really attach to anything. It's just stuck in
there, nothing special.
The wings can be stored as shown so that nothing touches the precious
paint that might stay soft for several days. They are actually quite
stable, though I don't let kids run amuck in my shop. The 2x4 stuck in
the lightening holes doesn't really attach to anything. It's just stuck in
there, nothing special.
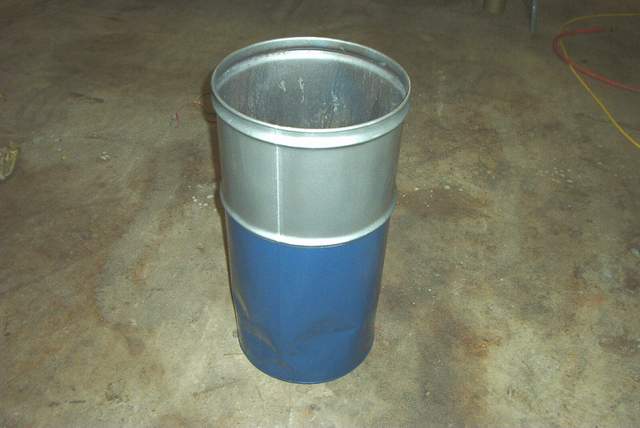 You gotta use up the leftover paint once you mix it. That's why every
paint shop has a few custom trash cans around.
You gotta use up the leftover paint once you mix it. That's why every
paint shop has a few custom trash cans around.
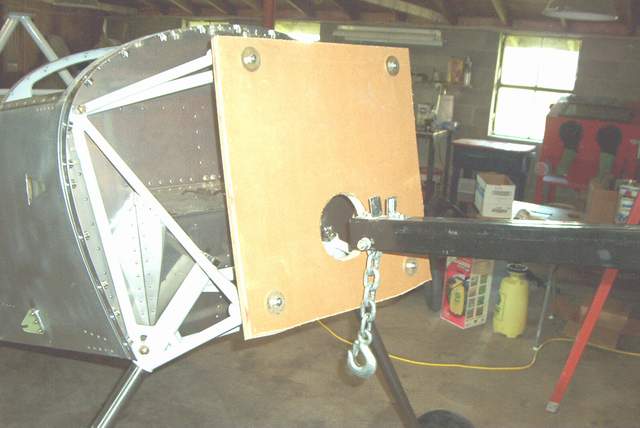
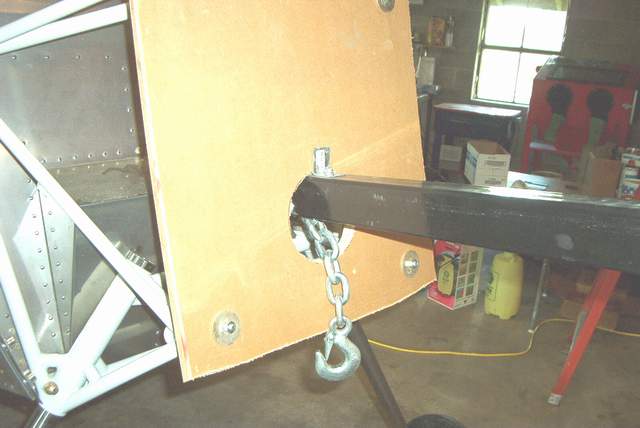
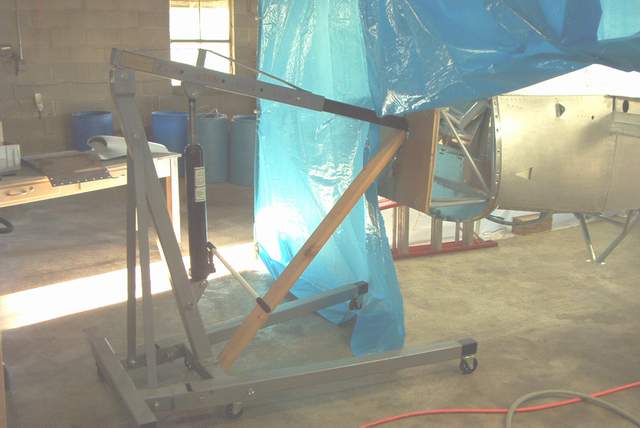
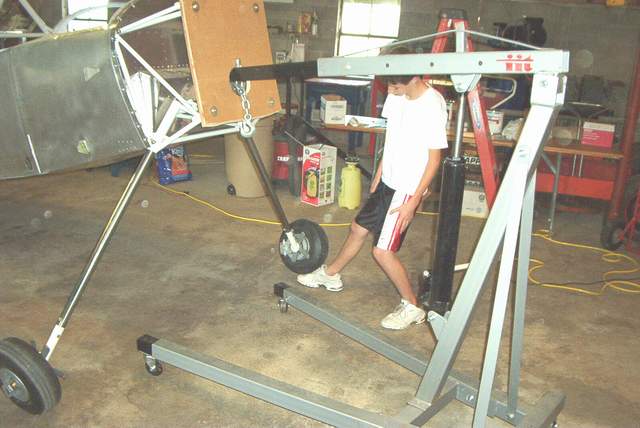
10/1/2003: You gotta be able to paint the belly. Hmmmmm,
how to do that? Here's one way: remove the gear legs, bolt a piece of
plywood to the engine mount, cut a hole in the plywood. Then use your
engine hoist, suitably modified with a couple tabs on the end of the arm, to
lift the fuselage. The tabs are ABSOLUTELY necessary to keep from
dumping your fuselage on the floor. I didn't drop mine, but it
definitely tried to move off the end of the arm. The tabs prevented
that. Whew! Yes it is just a little unnerving to rotate that
207 pound, high dollar fuselage.
Sure, there's an engine hoist lifting the front up. But what holds up the ass end? Very simple... just take off the tailwheel tire and set the tail spring on a sturdy sawhorse. Then rotate the fuselage at will.
The engine hoist and plywood can also be used when installing the gear leg fairings and wheel pants, to take the weight off of the gear.
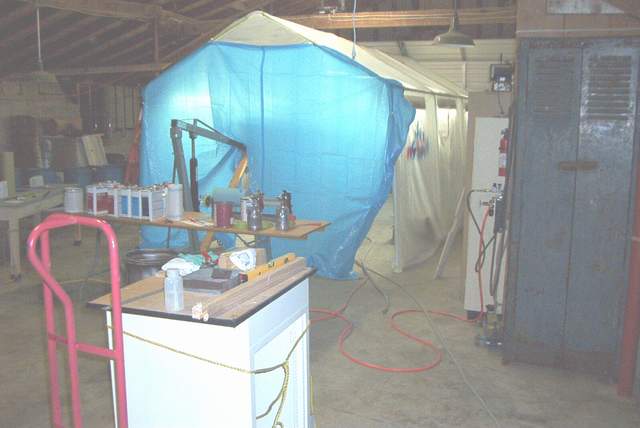 I set up a tent inside my shop so I could keep the dirt out and the heat in.
I'd run a small electric heater to warm it inside as needed... but NOT while
spraying. This is the same tent I camped in at Oshkosh. I covered
it with cheap plastic so as not to ruin the cheap vinyl that came with the
tent. This is one of those "garage tents" that you can get for about
$100 at flea markets, etc. Totally useless as a garage, but perfect for
Oshkosh or painting.
I set up a tent inside my shop so I could keep the dirt out and the heat in.
I'd run a small electric heater to warm it inside as needed... but NOT while
spraying. This is the same tent I camped in at Oshkosh. I covered
it with cheap plastic so as not to ruin the cheap vinyl that came with the
tent. This is one of those "garage tents" that you can get for about
$100 at flea markets, etc. Totally useless as a garage, but perfect for
Oshkosh or painting.
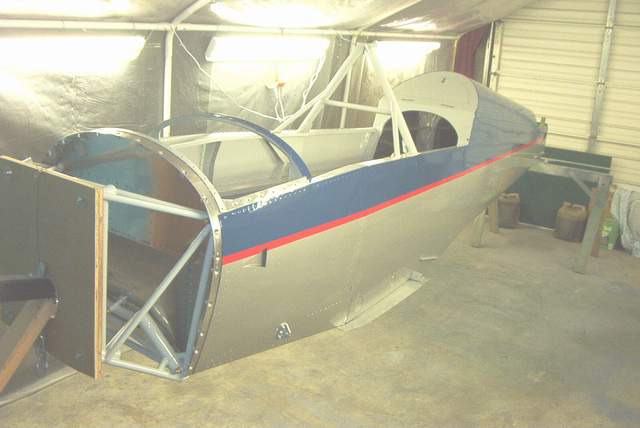
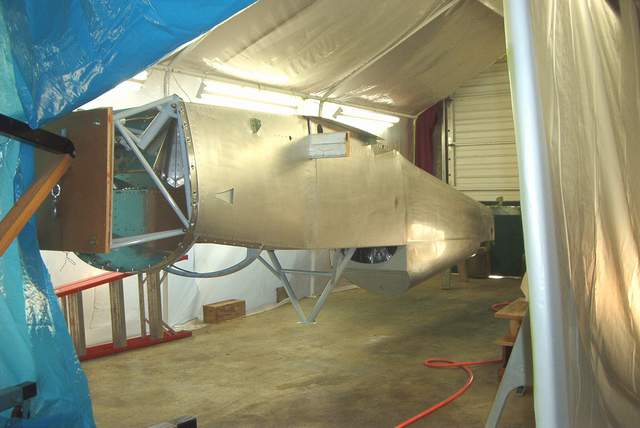 Ready for masking and priming.
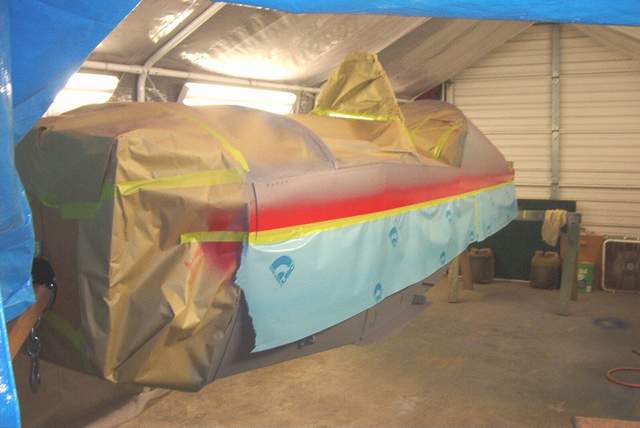
 The red stripe has been fogged on prior to this picture (no masking required).
Then the stripe is carefully masked. Although not really necessary, the
bottom is masked off simply to keep the excess blue off of the fuselage.
Might have saved an ounce.
The red stripe has been fogged on prior to this picture (no masking required).
Then the stripe is carefully masked. Although not really necessary, the
bottom is masked off simply to keep the excess blue off of the fuselage.
Might have saved an ounce.
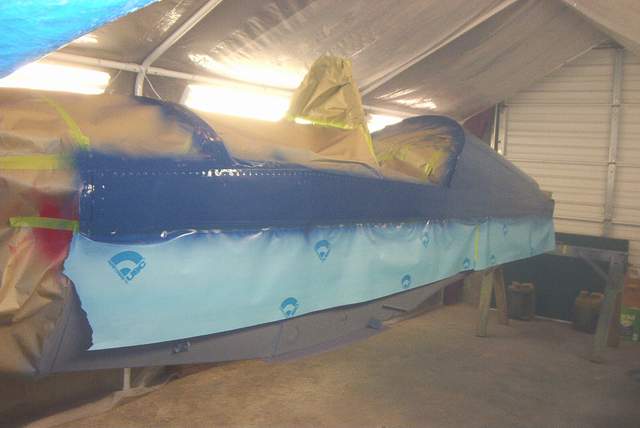 The blue is sprayed.
 The masks are pulled revealing the blue and red. I didn't need to pull
the tape off of the red, but did because I had to stop for the evening and
didn't like the idea of leaving the tape on top of fresh paint overnight.
The masks are pulled revealing the blue and red. I didn't need to pull
the tape off of the red, but did because I had to stop for the evening and
didn't like the idea of leaving the tape on top of fresh paint overnight.
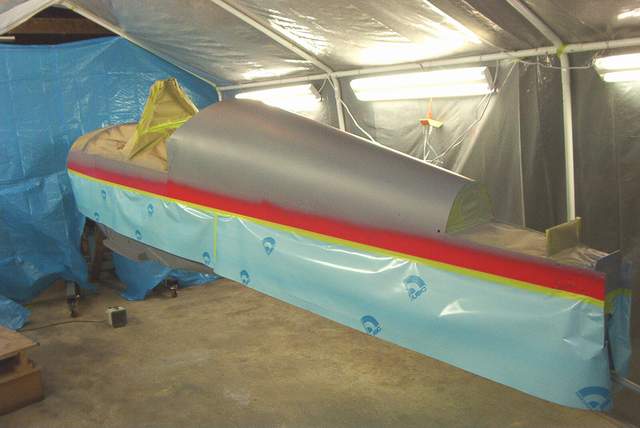
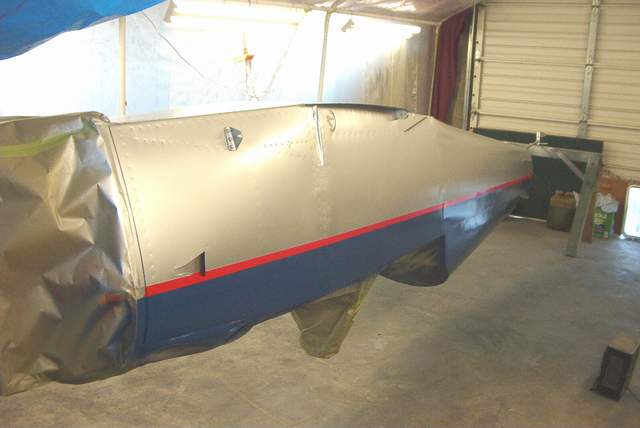 The following day, the red and blue were masked off and the silver was sprayed, shown here prior
to spraying the clearcoat.
The following day, the red and blue were masked off and the silver was sprayed, shown here prior
to spraying the clearcoat.
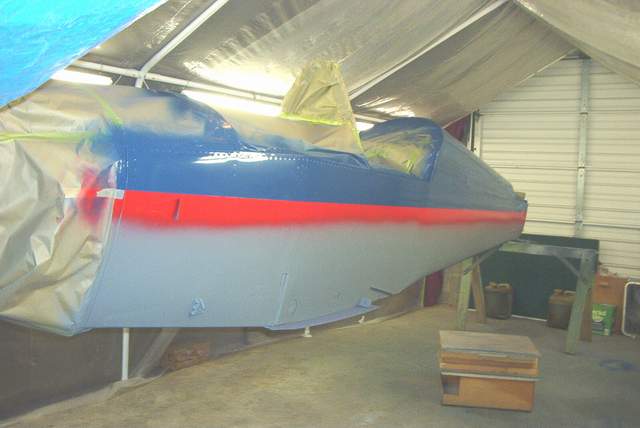
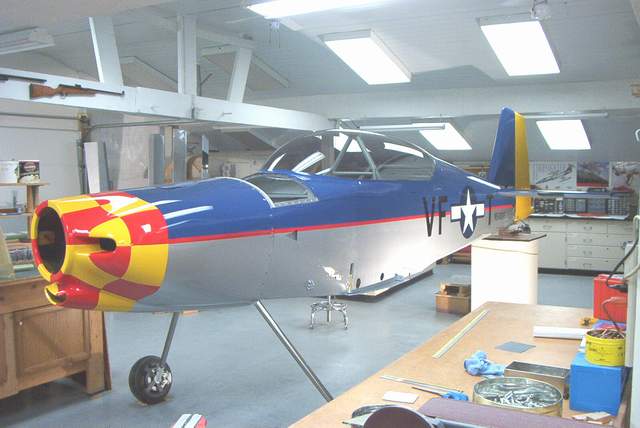
 Yeah baby! That clearcoat really makes her shine. The fuselage is done!
I'll buff and add the decals later when the paint is completely cured.
Yeah baby! That clearcoat really makes her shine. The fuselage is done!
I'll buff and add the decals later when the paint is completely cured.
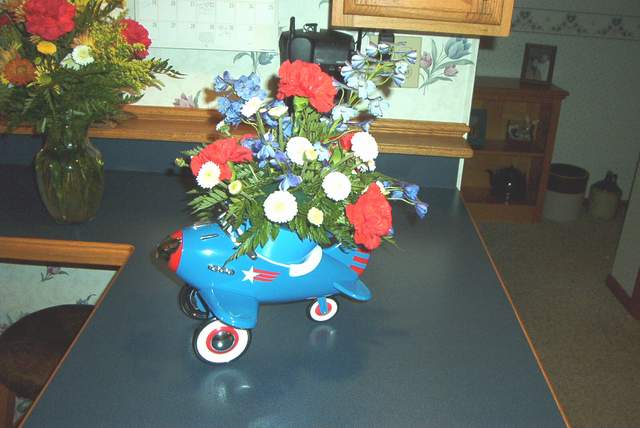 Whoa cool. You gotta have a cool wife to get flowers like these for your
20th anniversary. Yes, she got them for me!
Whoa cool. You gotta have a cool wife to get flowers like these for your
20th anniversary. Yes, she got them for me!
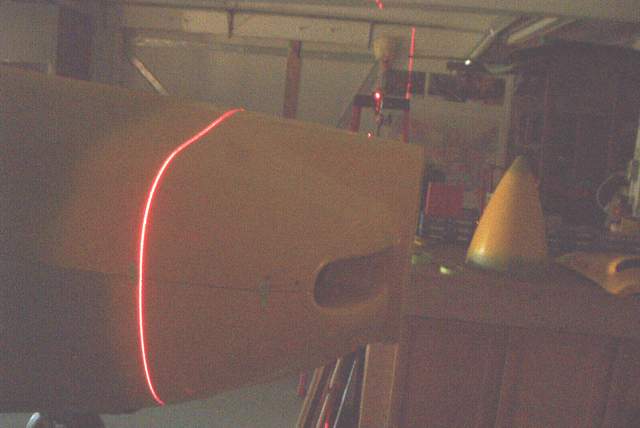
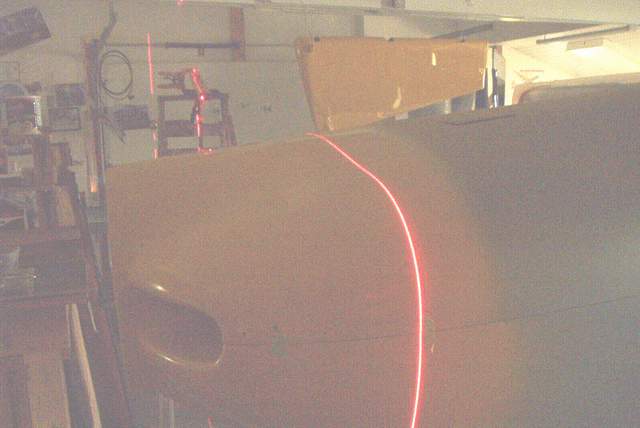 10-20-2003: Setting up the stripes, checkerboard, etc. where there
are curves is always a pain in the butt. Thanks to technology, you can
take two laser levels and do it easily. Set the lasers up without the
plane in the way, but with one laser on each side of where the plane will be. Set up one laser so the beam is level vertically. Then
make the beams coplanar, that is exactly in the same plane, by making the beam
of non leveled one hit the beam exit hole of the level one. Then rotate
the non level laser until its beam aligns with the leveled laser beam shining on the
floor. It's easier than it sounds. The idea is to have a
plane of laser light, perfectly aligned, so when you roll the aircraft into
the beam you will be able to align your masking tape easily.
10-20-2003: Setting up the stripes, checkerboard, etc. where there
are curves is always a pain in the butt. Thanks to technology, you can
take two laser levels and do it easily. Set the lasers up without the
plane in the way, but with one laser on each side of where the plane will be. Set up one laser so the beam is level vertically. Then
make the beams coplanar, that is exactly in the same plane, by making the beam
of non leveled one hit the beam exit hole of the level one. Then rotate
the non level laser until its beam aligns with the leveled laser beam shining on the
floor. It's easier than it sounds. The idea is to have a
plane of laser light, perfectly aligned, so when you roll the aircraft into
the beam you will be able to align your masking tape easily.
After you get the lasers set up, simply roll the plane into the beam as needed. For my checkerboard, I measured 14" aft of the spinner opening on each side and made a mark, leveled the fuselage, and adjusted the fuselage until the beam was shining on the 14" mark on each side simultaneously.
The beams will give you a nice straight line to follow regardless of how curvy the parts are. Well, it worked for me anyway!
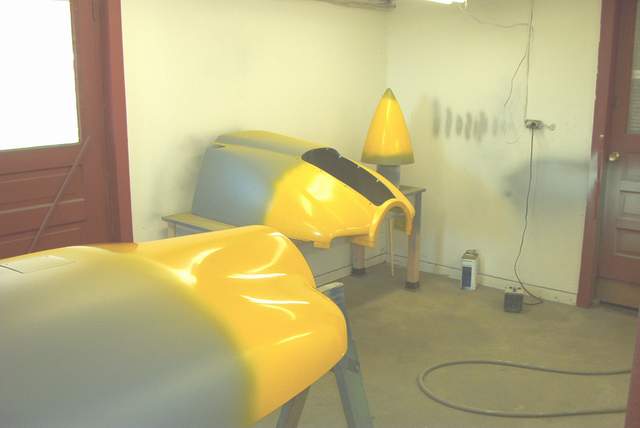 Fogging on the yellow paint. Then you mask the areas that stay yellow.
Next you fog on the red paint. Repeat until you run out of colors to
apply.
Fogging on the yellow paint. Then you mask the areas that stay yellow.
Next you fog on the red paint. Repeat until you run out of colors to
apply.
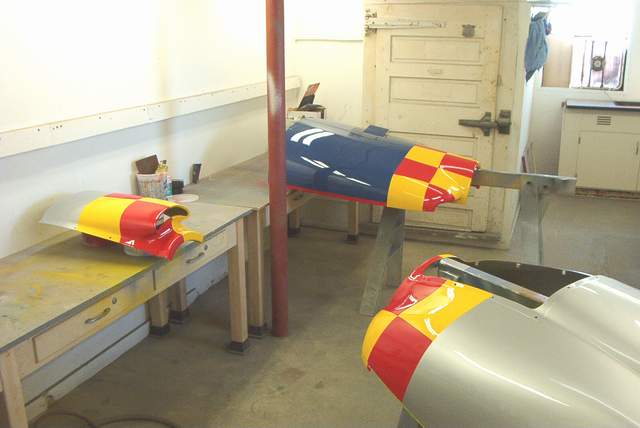
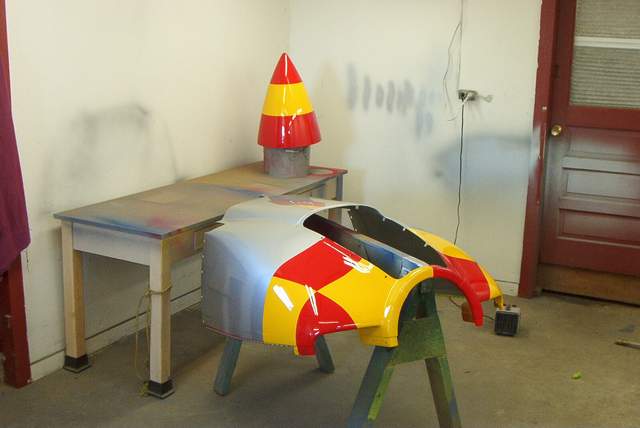 When you run out of colors to apply, your parts should look like this.
Woo hoo!!!
When you run out of colors to apply, your parts should look like this.
Woo hoo!!!

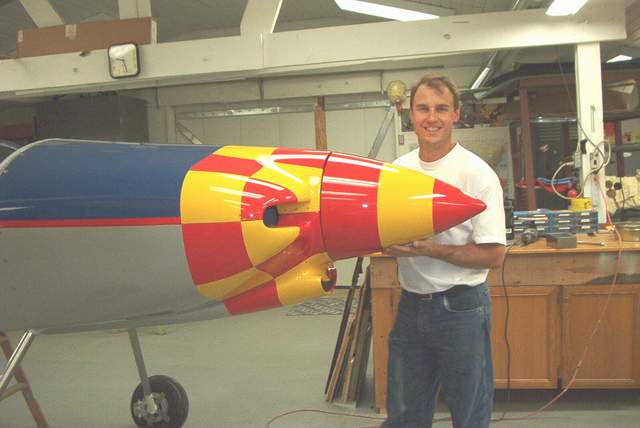
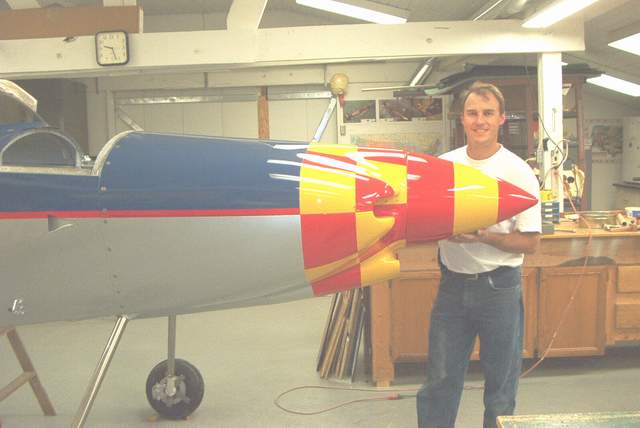 John Crabtree (green shirt) and me fondling the stunningly beautiful (IMHO!)
cowling and spinner. I can't believe how nice they turned out!
John Crabtree (green shirt) and me fondling the stunningly beautiful (IMHO!)
cowling and spinner. I can't believe how nice they turned out!
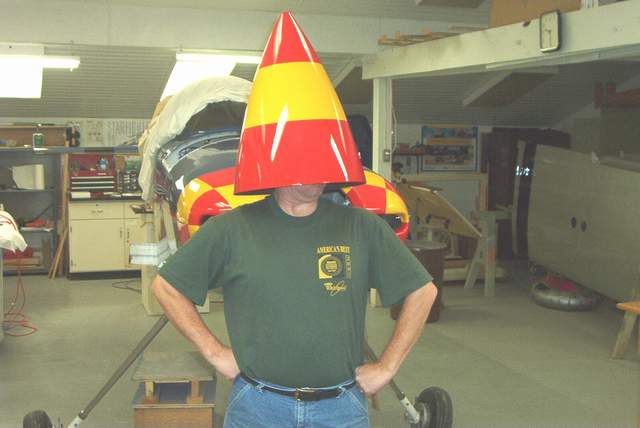 John does his famous "Cat in the Hat" imitation.
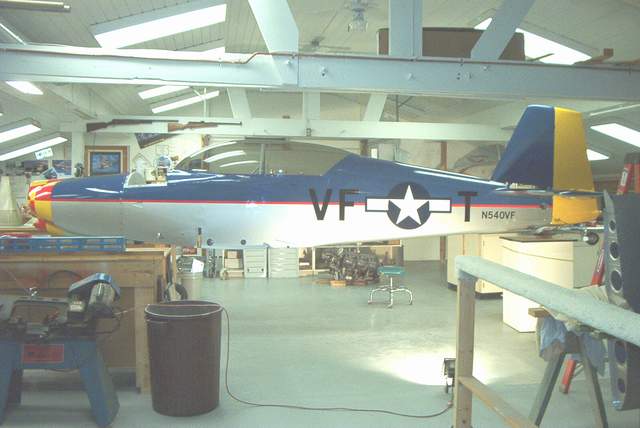
The painting is virtually completed.
 10-27-03: Decals go on fairly easily but there are a few "gotchas."
You might think that the decals would cover minor flaws in the paint....
nothing could be further from the truth as I learned. My fuselage has a
red trim stripe as you can see in the pictures. I didn't do anything
special to remove the slight masking tape edge that was left on each edge of
the stripe. When I applied the decals to the right side.... YUCK!
The paint edge showed through the decals like a #$%^ing neon sign. Oh
well, too late now... unless I order new stickers. Nah, I've got flying
to do. I can't be troubled with minor cosmetic boo-boos.
10-27-03: Decals go on fairly easily but there are a few "gotchas."
You might think that the decals would cover minor flaws in the paint....
nothing could be further from the truth as I learned. My fuselage has a
red trim stripe as you can see in the pictures. I didn't do anything
special to remove the slight masking tape edge that was left on each edge of
the stripe. When I applied the decals to the right side.... YUCK!
The paint edge showed through the decals like a #$%^ing neon sign. Oh
well, too late now... unless I order new stickers. Nah, I've got flying
to do. I can't be troubled with minor cosmetic boo-boos.
On the left side I carefully marked where the decals would cover the stripe. Then I took an ordinary razor blade and scraped off the tape edge. Looks great.
Speaking of looking great.... I love my paint scheme. It is exactly what I wanted... bright colors and just a bit unusual. I'm sorry but I feel that there are already more than enough red and white Rockets out there. Not that they aren't really pretty, I just want to stand out a bit.
Return to the homepage:
http://www.vincesrocket.com/
Last updated:
09/01/06
CAUTION: This web site is not a publication of, nor approved by, Harmon LLC, Team Rocket, Van's Aircraft or any other person or entity listed herein, except me. Be advised that I am a blithering idiot with neither brains nor money and my advice is not to be trusted. So there. You have been warned! Vince