Miscellaneous ?
Registration, anodizing aluminum, etc.
Registration:
FYI, my FSDO sent me a list that they suggest the DAR uses as part of an amateur-built aircraft inspection. This is lengthy, if not interested delete:
1. Does the builder have FAA Form 8050-3 (aircraft registration documentation, obtained via Aircraft Registry in Oklahoma City)?
2. Is the registration number affixed on the aircraft in compliance with FAR's 45.21 through 45.29 [personal note: this is supposed to be "permanent" . . . if you haven't painted your plane one technique which I think is deemed okay is to have a sign shop cut your N-numbers via vinyl. These can be applied and then removed prior to painting.]
3. Does the builder have an airplane and engine logbook? Do logbook entries, data plate, and information on FAA forms have the same builder, model, and serial number?
4. Is the current weight and balance recorded in legible format?
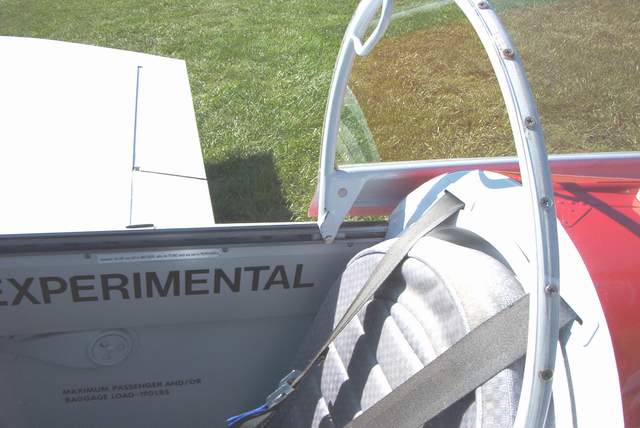
5. Is the word "EXPERIMENTAL" at least 2" minimum height and affixed onto the aircraft in compliance with FAR 45.23(b)?
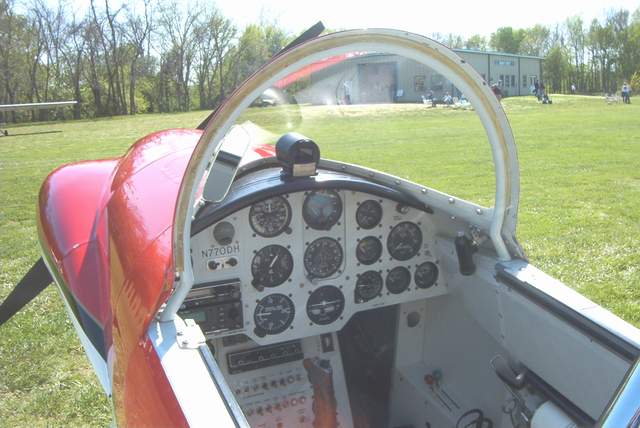
6. Are required instruments installed and properly marked?
7. Are cockpit controls identified as to function and position? Examples: fuel, throttle, carburetor heat, flaps, trim, etc.
8. Is the aircraft data plate attached to the aircraft in accordance with FAR's 45.11 and 45.13?
9. Is the passenger warning placard installed?
10. Have records been maintained and recorded in compliance with FAR 91.417?
11. Is the aircraft equipped with an Emergency Locator Transmitter (ELT) in compliance with the requirements of FAR 91.207?
12. If applicable, has a radio station license been issued for the aircraft?
13. Are approved seat belts installed at all seating locations?
14. Have an original and one copy of the letter of request for experimental, FAA Form 8130-6 and FAA Form 8130-12, a three-view drawing or photos with aircraft dimensions been prepared?
15. Is there a checklist schedule of proposed flight test or aircraft operating instructions for FAA review at the time of aircraft release for flight?
16. Has the aircraft flight, engine, and landing gear been rigged and checked for proper operation to the satisfaction of manufacturer's instruction?
17. Has the aircraft fuel system(s) been leak, vent, pressure and flow checked and found satisfactory?
18. Is the aircraft considered complete in every detail by the builder?
19. Has the applicant made application in accordance with AC 20-27D paragraph 10d?
Rick Jory, RV8A *end of comment*
Q: The regulation says something about 180 kts and above, use 12" N numbers.
A: The regs call out 180KT CAS at cruise. I stipulate a cruise of 230MPH TAS at 10,000MSL, which is 200KT TAS. Are you with me so far? You might need this for your inspector, so pay attention!
As you recall from flight school, TAS diverges from IAS at about 2% per thousand feet of altitude, so the IAS at cruise (200KT TAS) would be about 20% less, or 160KT. Now, if you bothered to calibrate your ASI, it would indicate 160KT at cruise, well under the 180KT CAS limit.
At any rate fellas, the reg uses a CAS number, which is more like an indicated speed, not a TAS. Our speed secret is our high TAS capability, thanks to the cubic inch gods. Of course, you CAN use this power down low to go fast, but the number is cruise speed, and we don't cruise at 180+KT CAS.
Cruise is a manufacturers' spec, and we can call out the altitude and power settings for this condition. Keep this handy -- you might need it! Cheers Mark Frederick *end of comment*
The FAR is pretty clear on this subject. 3 inch numbers are fine as long as your calibrated airspeed (IAS assuming it's accurate) at cruise is less than 180knots, and cruise speed is the speed that gives you the best range, so I'm just guessing here, but the Rockets best range speed is probably something like 130-140 KIAS so we are not even close to exceeding the 180KIAS mark.
Interesting side note: The U-2 that I fly is moving along at better than 415Knots at altitude, but its indicated airspeed is about 110Knots, so if somebody were to homebuilt a U-2, it could have 3 inch numbers. I doubt if even the Iraqis could read 3 inch or 12 inch numbers at 70,000 feet however. We just chalked a big white UN on wings when I left, probably 3 feet high, but I doubt if they will be reading that either.
Now everybody needs to go build faster so I have more opportunities to fly formation with other Rockets, something that I live for. Cheers Greg Nelson *end of comment*
Anodizing Aluminum
Shamelessly stolen from the internet
http://my.execpc.com/~gert/anodize.html another anodizing site to compliment the info below.
http://www.focuser.com/atm/anodize/anodize99.html and another
Anodizing at Home
by Jim Bowes
Based on the number of companies selling, and people looking for, anodizing services for their gun's aluminum bodies and parts, I wanted to provide this info to the paintballing community. I first came across the process in Super Chevy magazine, in an article about anodizing your own parts and brackets, for a custom touch on your hot rod. (* Original article by Bruce Hampson.) Often anodizing is considered and/or presented as a difficult and expensive procedure. As it turns out, it really isn't that hard or that pricey.
Supplies Needed:
The first thing to do is to get the following things together: First on the list is the most expensive item: a 6 to 12 volt battery charger. This item is what might make this too expensive for some paintballers. I (and most other hot rodders) already have one, for my car. If you don't, then you will need to pick one up. They run from $45.00 to $110.00 depending on model, functions, etc. While it may seem like a lot, it does have other uses. (You could charge a battery, for example.) =) The next item, though not that expensive, will take some effort to find: battery electrolyte, a.k.a. sulfuric acid. This should be available at a battery wholesaler for about $2.00/gal. To make the negative ground , you will need some aluminum ground wire and aluminum-foil. The wire can be found at an electronics store for about $35/spool, and you should have the foil in the kitchen. If you happen to be out of foil, you can pick up some more at the store when you go to buy the last item for this project.
No super-special chemicals or
solutions necessary to make the colors; just plain-old fabric dye. (Something
like Rit dye, for about $5.00.) Rit offers something like 30-40 different
colors, so you have quite a number of choices for what color you want your parts
to be. An optional item is nitric acid: about $25.00/2.5 L. (This is used to
clean parts prior to anodizing, but there are some cheaper alternatives. See end
notes.) This is available at chemical supply store s. Should you not be able to
find any, you can try to get on the good side of the high school science
teacher. He may help you out since you only need a few ounces.
Safety Precautions:
There are a few precautions I want
to go over to help keep you from blowing up the house or trashing the garage.
First of all, do not mix or store your anodizing solution in a glass container.
Something could happen to make it break, and most households are not equipped to
deal with that kind of spill. You also don-t want to knock over the container,
so a stable, rubber bucket makes a good choice. You will also need to be certain
that the part you want to color will fit in the container without sticking out
of the solution, and without touching the negative ground in the bottom of the
container. Any acid that you don't use, keep in what it came in, or an old
plastic bottle, like a bleach bottle. You can also store your used solution this
way for doing more parts later. (Make sure that there is absolutely no bleach
left in the bottle. Acid and bleach make chlorine gas. Very bad. Don't breath.
Poisonous.) Safety also applies to the nitric acid, but in a different way. It
is imperative that you label and keep track of this stuff, as it is a stronger
acid than sulfuric, and more dangerous. The breakage/spill problem is not as
likely since you won't have that much around. (Unless you bought more than a few
ounces from the chem store.) The last note about the acids is to mix properly
when adding acid and water. Always pour acid into water, never the other way,
and do so slowly, being sure to mix in well. There is a reaction taking place
and it releases a lot of energy. During the anodizing process, you will be
running electricity through a weak acid solution. This creates hydrogen (jus t
like charging a battery) which is very flammable. This stuff burns at the speed
of thought when ignited, so do be careful. (Read as Remember the Hindenburg?)
Make certain that there is some way to ventilate the project area, and DO NOT
let any sources of ignition near the project area. Other precautions you should
take include safety glasses, rubber gloves, and maybe some sort of drop sheet
under the area.
Preparations:
One of the most essential things you need to do in order to get even color over the whole part is to be sure that the part is absolutely clean. You want it free of all contaminates, from dirt to the oils in your skin. This is where the nitric acid and some rubber gloves will help. A solution of 1-2 ounces of nitric acid in a gallon of distilled water will allow you to clean the surface in preparation for the anodizing. Aluminum oxidizes very quickly when exposed to air, so the easiest way to keep it clean is to clean it just before you are ready to start working on the piece. (You should rinse the part with distilled water before you put it in the next acid solution.) Other options are carburetor or brakes cleaners, or other similar degreasers. Soap and water will work also, or cleaners like Simple Green. These are cheaper, a nitric acid was h is the best. (You decide, it's your money.) =) Make your negative ground with the aluminum wire and foil. Shape the end of the wire into a paddle shape and cover the round part with the foil. What you want to do is create a flat, round shape to sit on the bottom of the bucket, with a lead that comes up out of the bucket. You will clip the battery charger's negative lead to the wire that comes out of the bucket. When you are ready to start, you will want to mix up your immersion solution. In your rubber bucket, combine the sulfuric acid and water to come up with a solution that is about 30% water. (1 part water to 2 parts acid.) Place the paddle in the bucket and attach the negative lead. Then attach the positive lead to the part, making it an anode, and immerse it in the solution. (Remember that the two leads the paddle (cathode), and the part (anode) should not touch.) This is the best time to turn on the charger: once the part begins to fizz, leave it in there for about 10-15 minutes. After about this time the part should no longer conduct electricity. (You can also use an ohmmeter to check conductivity, but this is not needed.) Turn off and disconnect everything, and rinse the part in cold water. Don't use hot water! You'll find out why in the next section.
A couple of notes:
I have read some other procedures that say it is important that the copper lead from the charger does not enter the acid solution. The article says nothing about this, and shows a picture with the lead right in there. It may take some trial and error to find out if this is a problem. It wouldn't be a bad idea to get some scrap aluminum and play with it before you start anodizing your paint gun parts. You can check out the above, as well as pick the colors you like best. If you test out some colors, you'll also learn just how long or short you need to work with the color solution.
Color:
So now it doesn't conduct
electricity, and is ready for color. It's been rinsed and waits eagerly to
change to a new look. Don't wait too long to do the color, due to that oxidizing
thing again. You want to mix up a strong solution of dye and water, in a
container that can be heated. The solution needs to be at low heat, such as on
the stove, so bread and cake pans work well. Again, you need something that will
fit the whole part, but it's okay if it touches the bottom this time. I would
recommend turning parts every few minutes just to make sure that you get
all-over color. Inform your mom or wife that the pan can (and will be) washed
out. It is important that the heat be low enough. If the solution gets too hot,
you will seal the surface, and it will no longer take any color. (See, told you
to rinse it in cold water!) Leave it in the dye until the part is slightly
darker than you want it. The next step is to seal the surface of the metal in
clean, boiling water. This will leech a bit of color from it, thus the slightly
darker color in the previous step.
End Notes:
It is important to realize that the process described above will yield only one co lor on your part. At this time, I haven't found out how to do any of the splash type of anodizing. (That's okay though, it looks really ugly anyways.) =) Should anyone happen to figure it out, I suggest you submit it to Warpig so they can put it up for ot hers who like it. \par Also, this process is for aluminum. I don't know how, or if, it will work on other metals. (I doubt it.) Anodizing only works well on rock metal like bar or sheet stock, as opposed to castings. If it was forged or machined, it should have the density to take color through this process. I figure this shouldn't be too big a problem with the guns, but just thought I should let you know about it.
Something to consider when looking for a charger, is how many amperes it puts out. Without getting into any mumbo-jumbo, anodizing relies on 10 to 40 amperes per square foot. For small brackets and such, this is no problem. The larger parts in a gun however, may need the higher levels of amperes. The other note about part size, has to do with how lon g you leave it in the solution. Above it said 10-15 minutes, but that is for a smaller part. The larger parts may not only need higher amperes, but more time as well. I would recommend an ohmmeter, but again, I have one already.
So there you have it. Quick , fairly easy, and not too expensive. If you don't have the charger, then your first anodizing session could cost as much as sending your gun out to be done. But, then you can do it again for much less. Or do your buddies stuff. Or talk them into chipping in on a setup for all of you to use. We all know ways to help make things cheaper.
The Author will accept no responsibility from damages or injuries as a direct or indirect result of attempting this procedure. The only person liable is you, so be careful and think!
Hard Anodizing Aluminum
Yes, regular anodizing makes the surface harder while preserving the normal hardness of the material just under the surface. It is also a very thin coating or "shell" (.0002" to .0008" if colored). Hard Anodizing results in a thicker surface shell of oxidized Aluminum (.001) and unfortunately can't be colored. But the surface hardness can range up to Rockwell 65C!! But the technique for Hard Anodizing aluminum is similar. To hard anodize aluminum, follow the above instructions but lower the temperature of the water/electrolyte mixture to near the freezing point of water (0 degrees C or 32 degrees F). Also, the input voltage must be increased to 75 volts (DC) or less, depending on the desired hardness. There was no specific data given, so you will have to experiment some. Maximum voltage will result in maximum surface hardness, but you are on your own for the rest.
Miscellaneous:
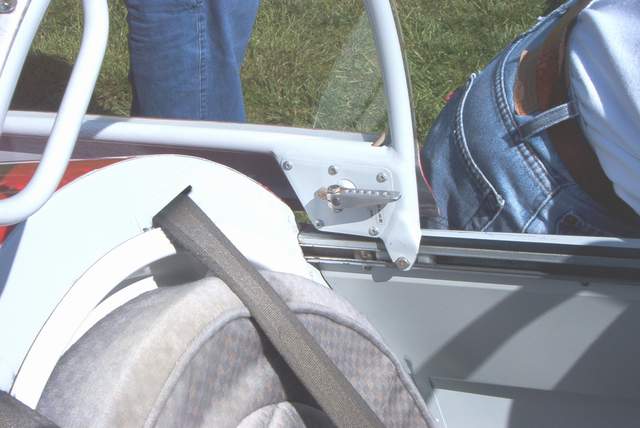
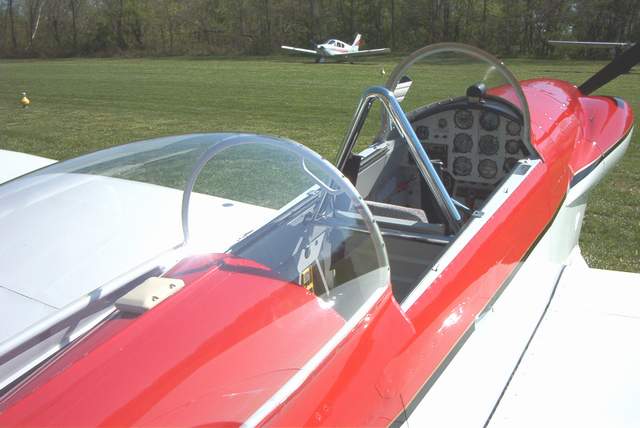
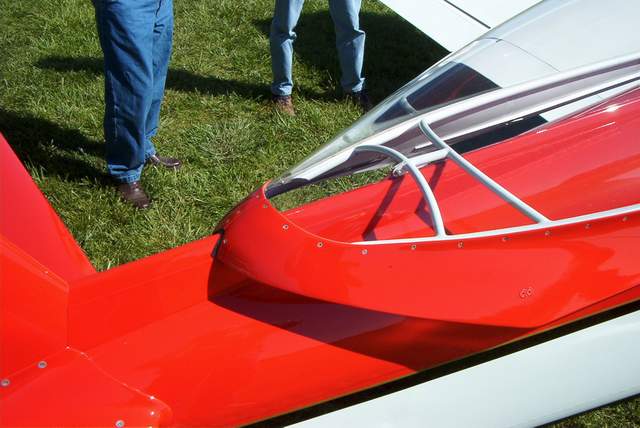
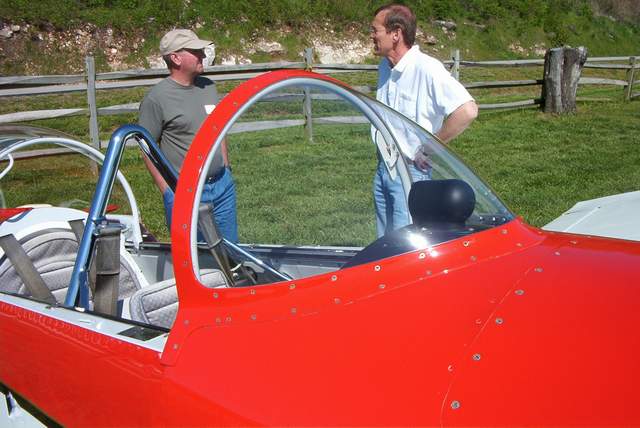
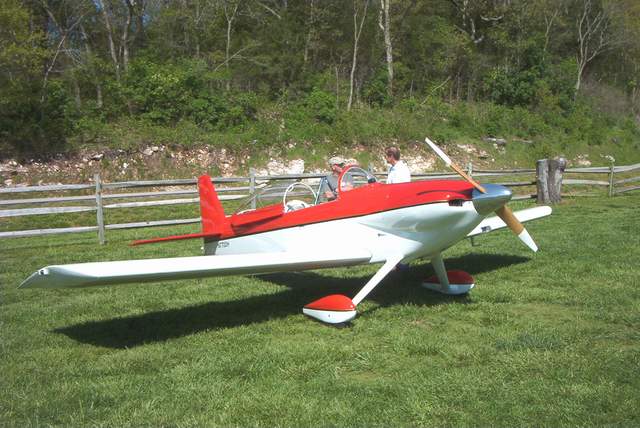
Not a Rocket, but a super nice slider on John Hawley's RV-4. John had this to say:
Vince,
I had the pleasure of meeting you last Sat. afternoon down at Les Featherston's
fly-in.......what a place! I didn't get there until mid-afternoon.....just
stayed a little while, but it was great meeting the true hard-core stragglers
who were still there. Back home in Wichita, yesterday I was making the usual
check of Doug Reeve's World Wide Wing site and came across your photos of the
event. Lo-and-behold......there was a picture of that awesome Rocket, getting
ready to go up for a ride, and best of all.......there was the tail of my
red/white RV-4 (with sliding canopy) in the background! Cool, I thought......on
the internet. Anyway, then I continued looking through your great photo album
and ran across the pictures of the 'fat RV-4' which you had taken at Oshkosh
2001. You told that it was built by Joe Meyer of Duncan, British Columbia!!
That's the guy that built MY RV-4! I've never talked to Joe, but had heard he
built another -4 after mine, one that was wider and longer.....and by golly,
you've got pictures of it! I was thrilled to finally get a glimpse of the
sister-ship......it has a sliding canopy too.....and is painted just like mine.
Have been thrilled with the plane, and decided I'd try to give Joe a call of
appreciation some day. The RV world is smaller than I thought......thanks for
the good coverage on Rebel's Bluff.....and the glimpse of the 'sister ship', and
get that Rocket finished! John Hawley.
Shipping big crates:
Here's a tidbit that might SAVE somebody a few BUCKS. Over the years I have come to expect that crates from the west coast (Van's) shipped to Indiana will cost between $60 and $200. Imagine my surprise when a single crate from Bakersfield cost $511 for shipping!!! I said "WHAT!!!!" to the man at the shipping terminal and explained that I thought that was way to much money for a single crate. After a few minutes he explained that the crate was misclassified and the charge was $227. Airplane parts cost more than airplane materials to ship he explained. Huh? What difference should that make? I thought that $227 was still too high but paid it rather than shipping it back. So here's my advice: Always pick your crates up at the terminal as you won't be able to easily negotiate with a truck driver idling outside your garage. Also if the shipping cost seems too high, start squealing... the man at the terminal is more likely to negotiate than to ship something back! Vince Frazier *end of comment*
To those of you who want better air flow through (hot and cold) the cockpit with smaller systems providing you with greater comfort, you need to stop the battle of inlet air coming from the front of the plane (your design) with that coming from the tail (and to some extent from the wings, rear canopy skirt, flap rod holes, etc.). The RV-4 tail PUMPS!!! and I suspect that the other designs do also.
After 35 hrs. in the back of an RV-4, X-country, that had a single hole in the fire wall (no hoses in cockpit) providing heat evenly to the cockpit (front and back) I wanted to know how it worked so well. Other RV's didn't work this well, including mine. Sleeping under the wing, I spotted a hole in the center of the belly of the tail cone that turned out to be one of those plastic NACA ducts BACKWARDS (located 49" ahead of the back end of the fuselage). WAS this it? I wasn't about to cut up my bird to find out. The owner had purchased the RV-4 and had no idea why it was there. He thought it was part of the design (no hoses to it).
Here is how I improved cockpit comfort: To stop cold air from coming in and freezing certain body parts: 1) I sewed up some boots for the aileron push tubes from light weight synthetic Swede leather (women's garment from the GoodWill provided the material). 2) Sealed the canopy to canopy rails with "P-Strip" from Van's. 3) Sealed the front of the canopy to the cowl boot with the silicone pressed into plastic wrap. 4) Sealed the front right corner of the canopy to canopy rail with a piece of foam wedge. 5) Covered the flap arms with a shaped aluminum panel (this was for safety also). No problem with rear skirts because I don't have them. No stick boots either but maybe one day. The lack of stick boots does allow for airflow under the floorboards but I'm not sure that this is an advantage. All of this sealing improved the situation.
My source of fresh air is a 7/8" hole in the left wing root fairing, plumbed with 1" hose to an instrument panel mounted Wemac(sp) ball. My source of hot air is a standard heat exchanger through a 1.5" valve (Lancair) on the center of the firewall. In the future I will be adding some general purpose cooling air near the rudder pedals with a valve. Right now I am bypassing the heat exchanger in the summer. Before I made the previously mentioned changes, this is what happened. I would open my vents and would receive a blast of air that would then diminish as the cockpit would pressurize. The fight was on between the front air and the tail air. The "front lines" (front lines= that point where the two pressure fronts meet) were at the cockpit. Without stick boots I have plenty of openings front to back under the floor boards. With stick boots I would have to open a 2" (min.) hole in the back of the baggage compartment (in a location where baggage would not block it). The RV-4 has enough of an air flow leak around the back seat to the baggage compartment.
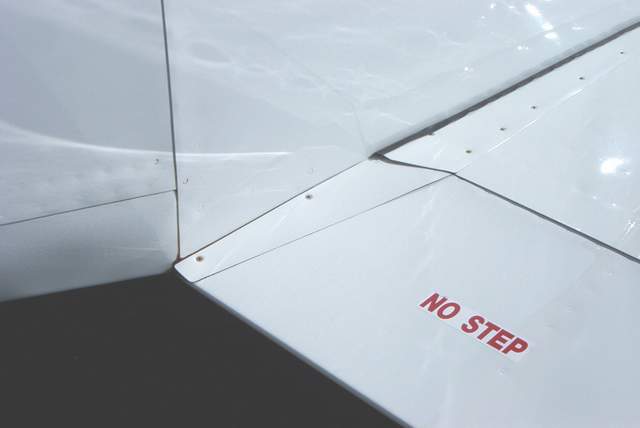
Optimizing the ventilation: 1) Remember that I didn't want to cut a reverse NACA Duct in my RV's belly? It so happens that I have an inspection hole forward of the first tail bulkheads (this was to get at the bolts that hold my tail on. I made up a second cover plate for that hole, cut an 1 1/4" hole in it and made a fiberglass cover for the hole that looks like a rounded over half of a jar lid. Think of it as a reverse scoop. The trailing edge of this device is a 1/2" above the cover plate surface. The rounded over leading edge is a 3/16"radius (from the side it looks like the top half of a wing leading edge) and the purpose is to create a low pressure area over the hole. I haven't sewn a boot for the elevator push tube at that first tail bulkhead yet, but I moved the battle "front lines" back to the tail where the air flow is vented via the device I made up. I now have so much hot air that I can't open the valve but a crack. 2) Seal the tail off with a boot and put a reverse something NACA duct (inset) or low pressure device (outset) forward of the booted bulkhead on the belly or wherever. My proof of concept part is just under the leading edge of the left horizontal stab. (remember that it is also an inspection cover). *end of comment*
There's much discussion about whether air outlets are needed. Some have suggested making boots to seal around the aileron pushtubes and sealing other openings under the floorboards. Who knows? I plan to fly mine before I do any work to enhance the ventilation. Vince *end of comment*
Return to the homepage:
http://www.vincesrocket.com/
Last updated: 03/25/10
CAUTION: This web site is not a publication of, nor approved by, Harmon LLC, Team Rocket, Van's Aircraft or any other person or entity listed herein, except me. Be advised that I am a blithering idiot with neither brains nor money and my advice is not to be trusted. So there. You have been warned! Vince